
Well, well, well here we are again, Friends and Fellow Bakers! I took a little break after my Christmas breads because making 12 breads in 9 days and then posting 12 days in a row was a lot of work. Now it is a crazy snow day and I am ready to get back to our regularly scheduled programme: Technical bakes from GCBS.
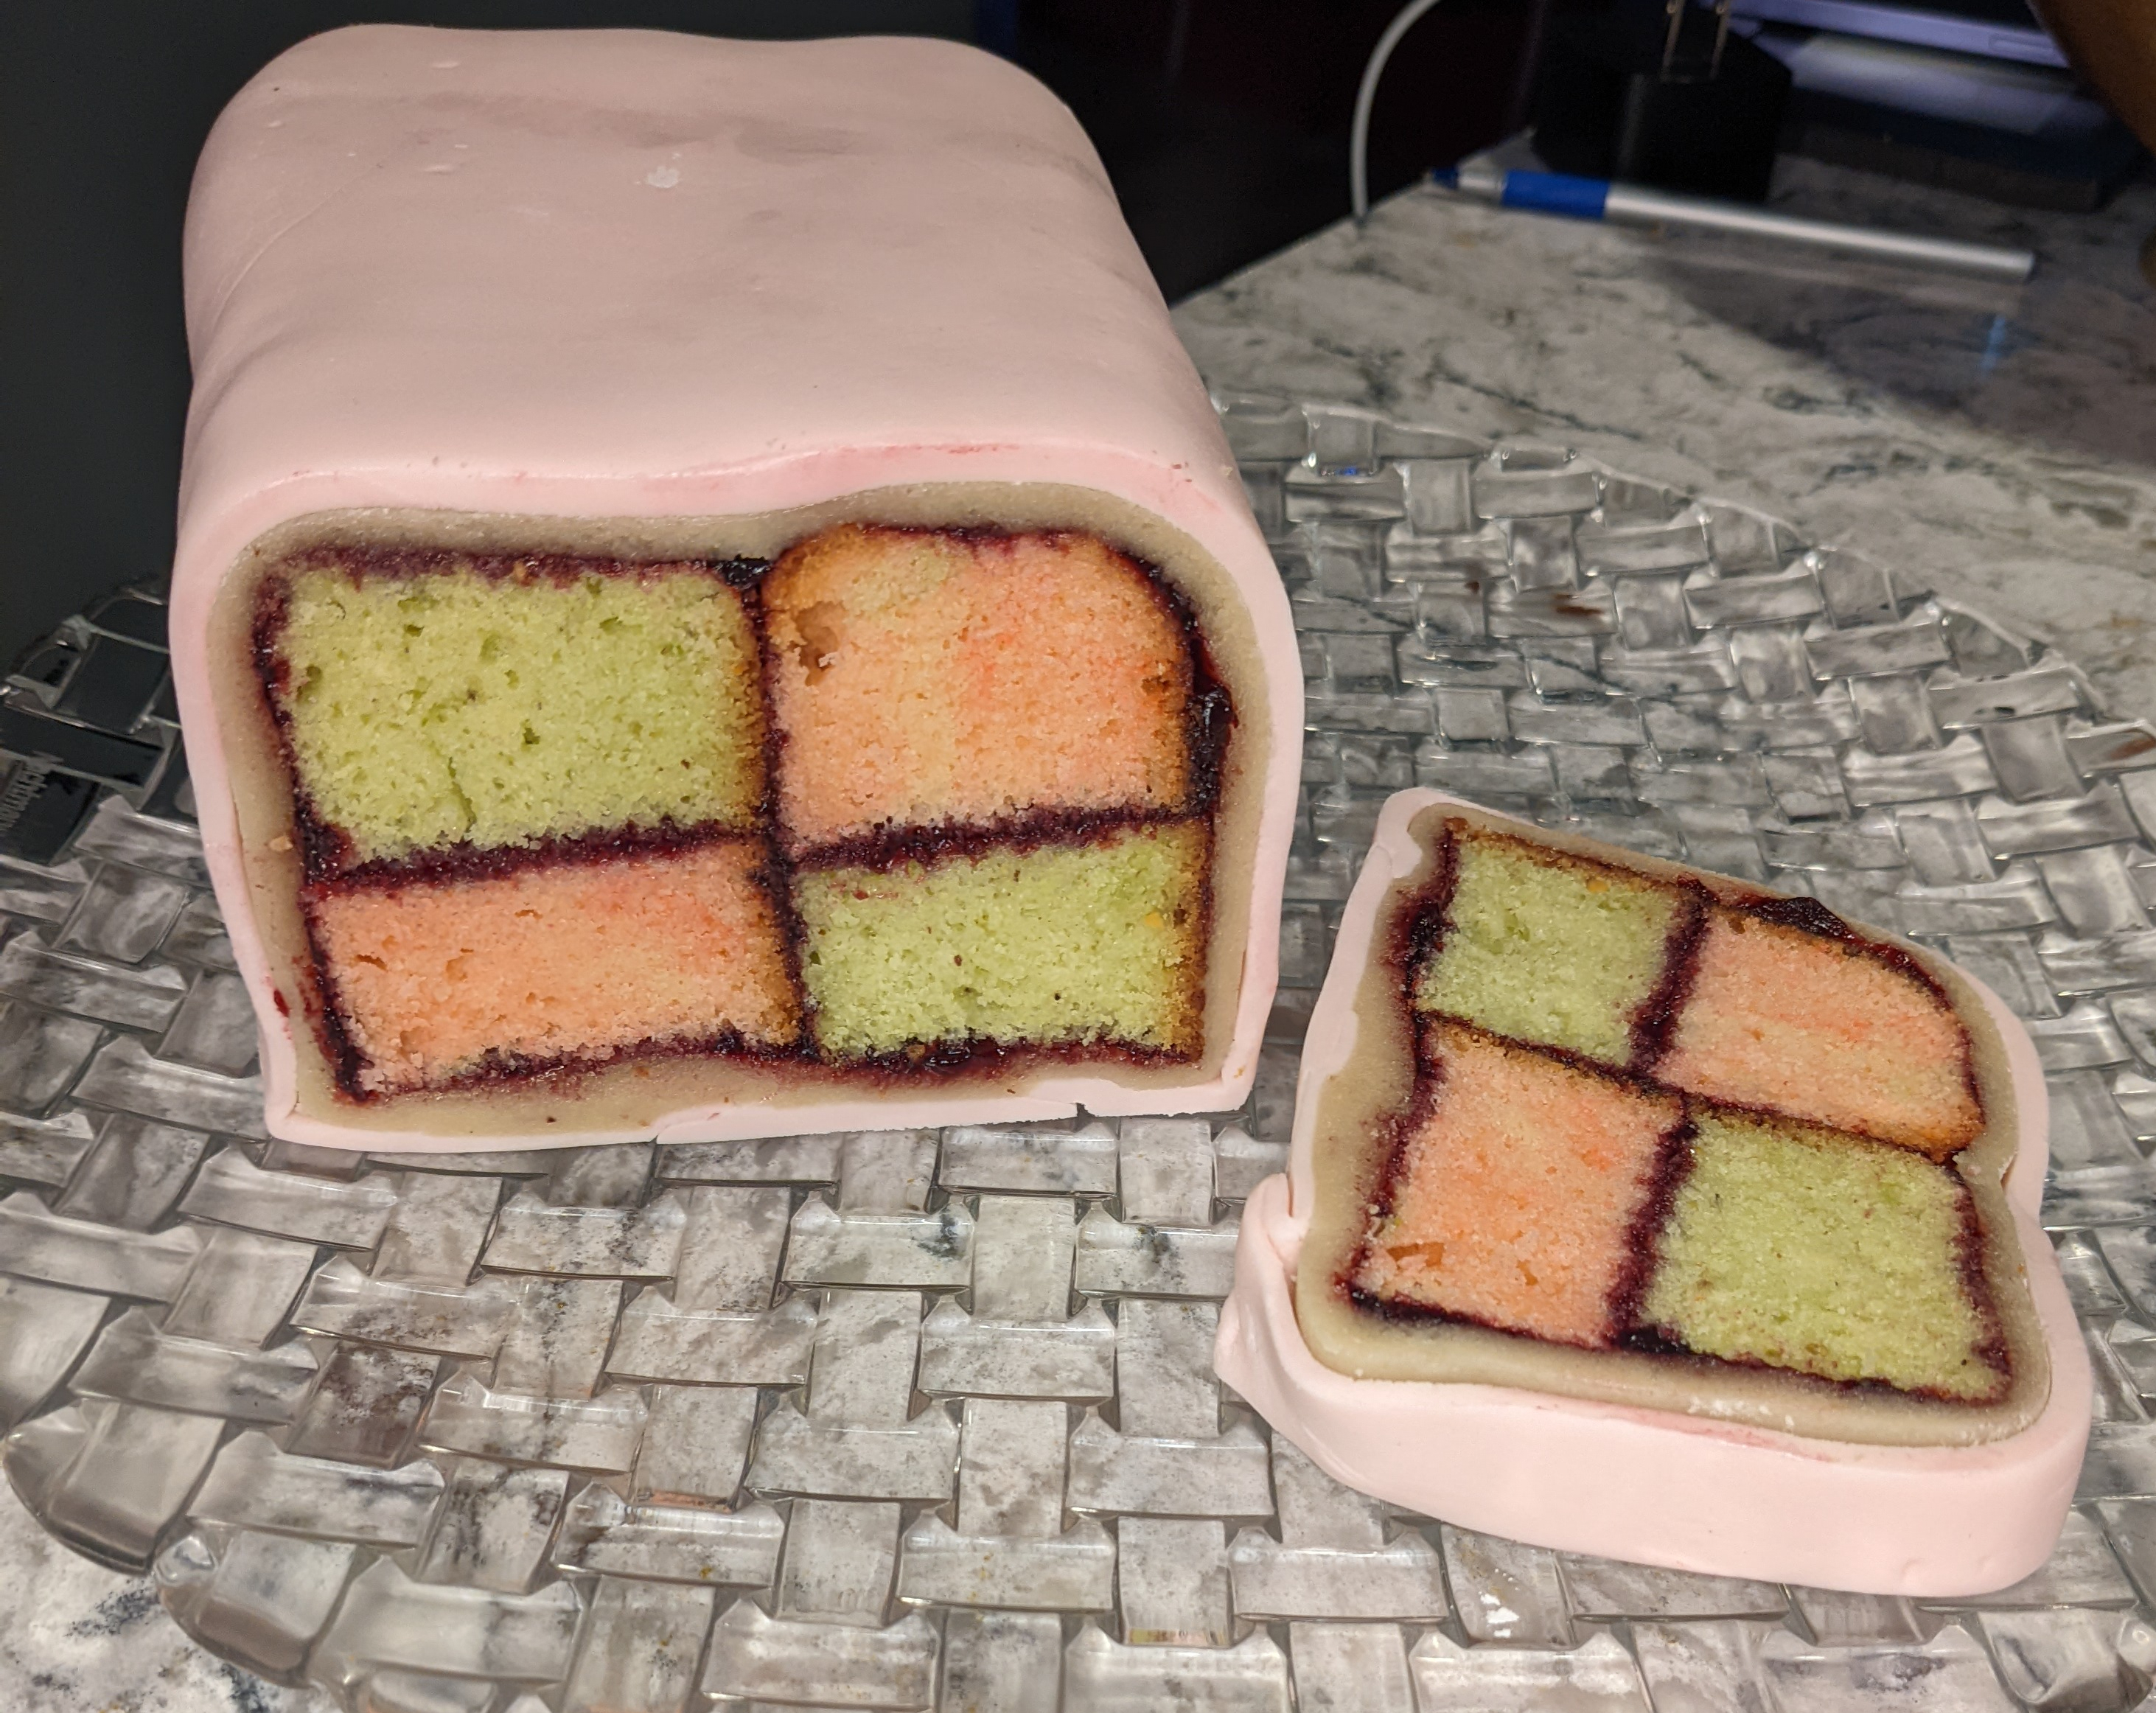
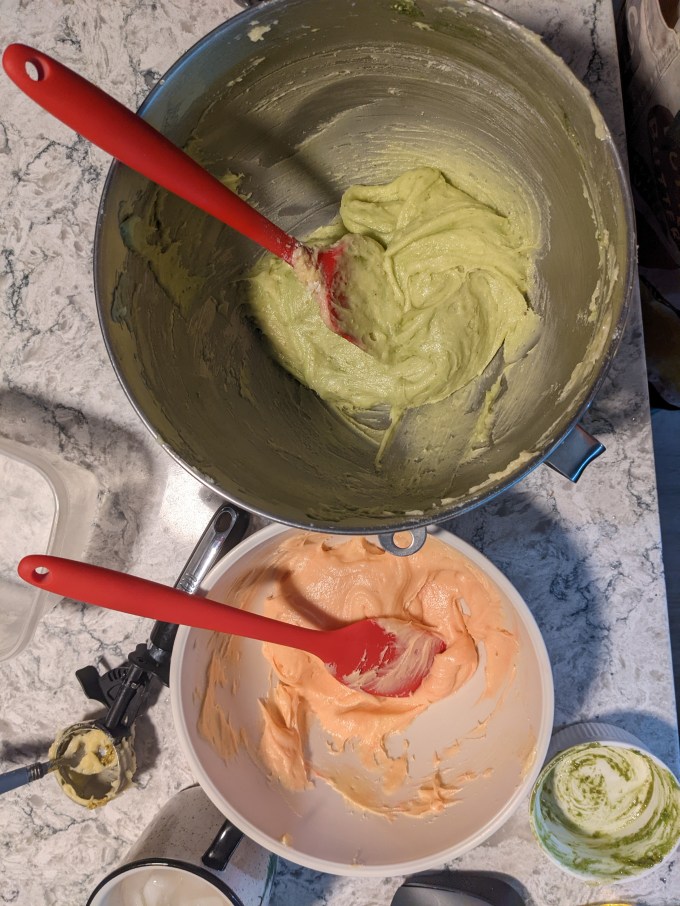
The battenberg cake is a British cake that is made to have a distinct checkerboard pattern of two different sponges inside. The layers are held together with jam and the entire cake is wrapped in marzipan. This version from Season 1, Cake week of GCBS (recipe here) also has an additional layer of fondant on the outside to make a nice, clean presentation. The sponge for this cake is quite simple. A cursory search suggests that the colours are usually pink and yellow. This GCBS version was pink and green, using pistachio for the green and cherry for the pink. I couldn’t find the cherry extract called for, so I just used almond. The recipe for the sponge itself was a basic butter cake; this is exactly how I make cake when I am winging it and not actually using a formula.
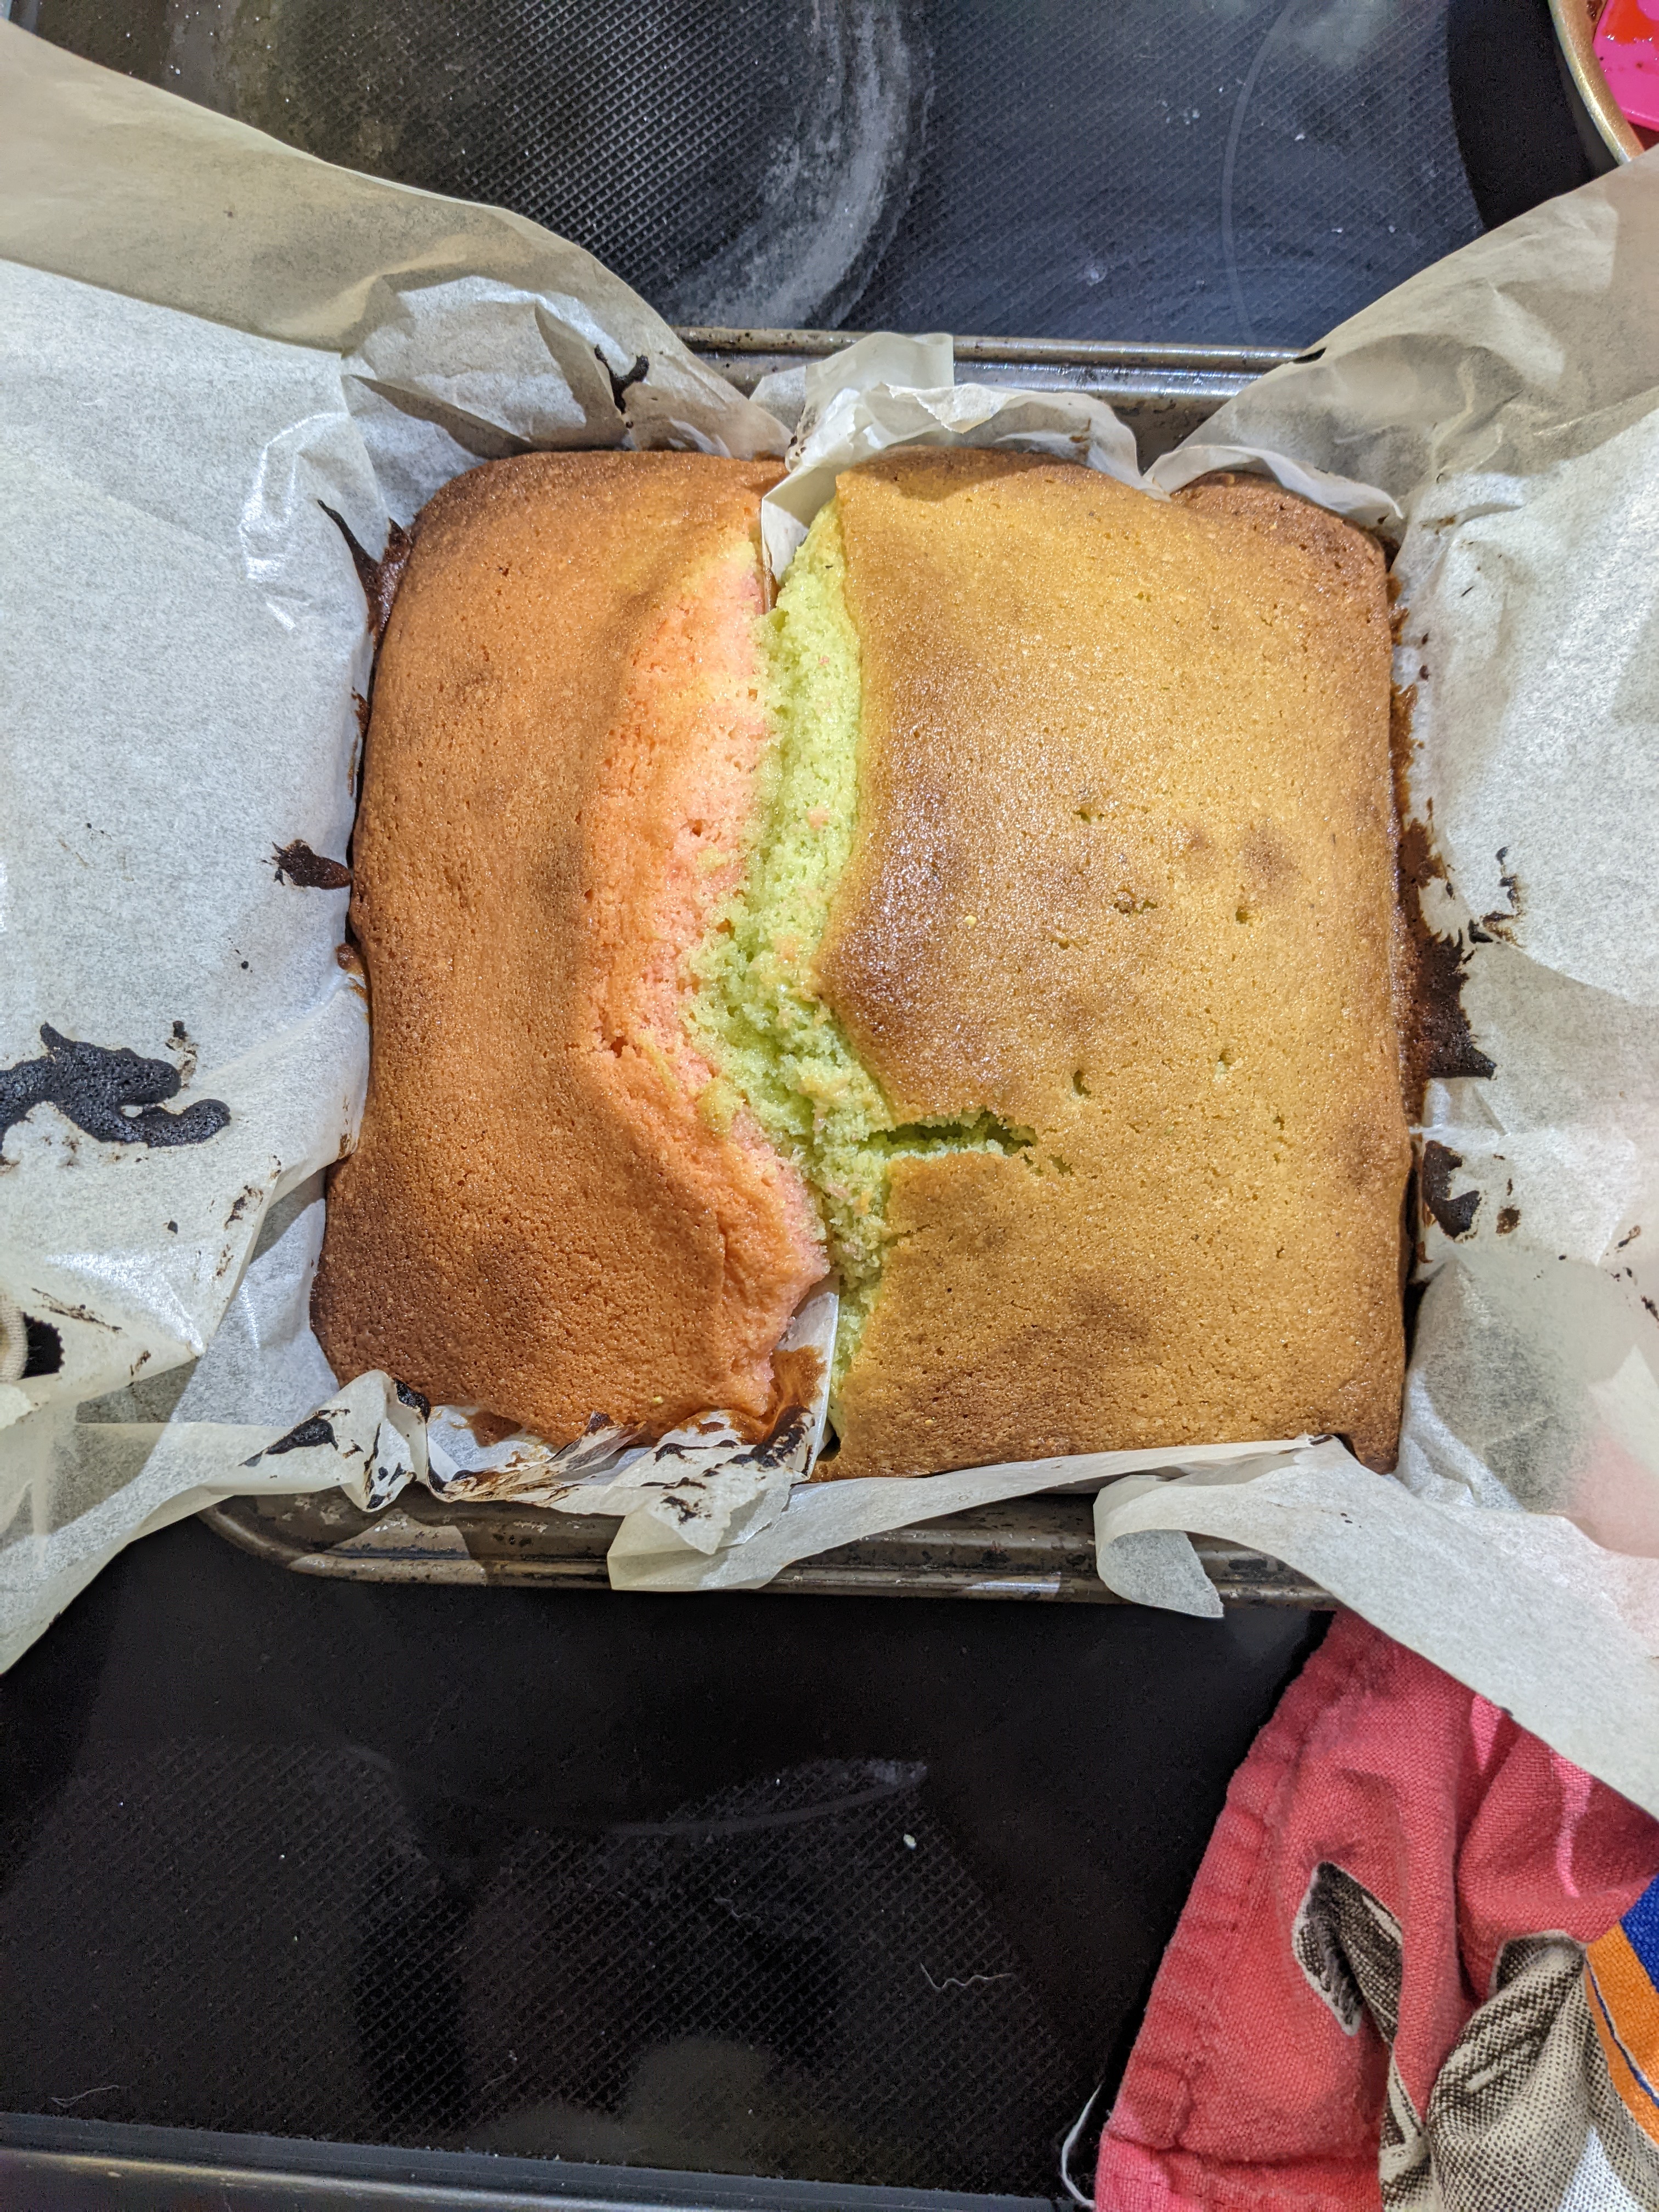
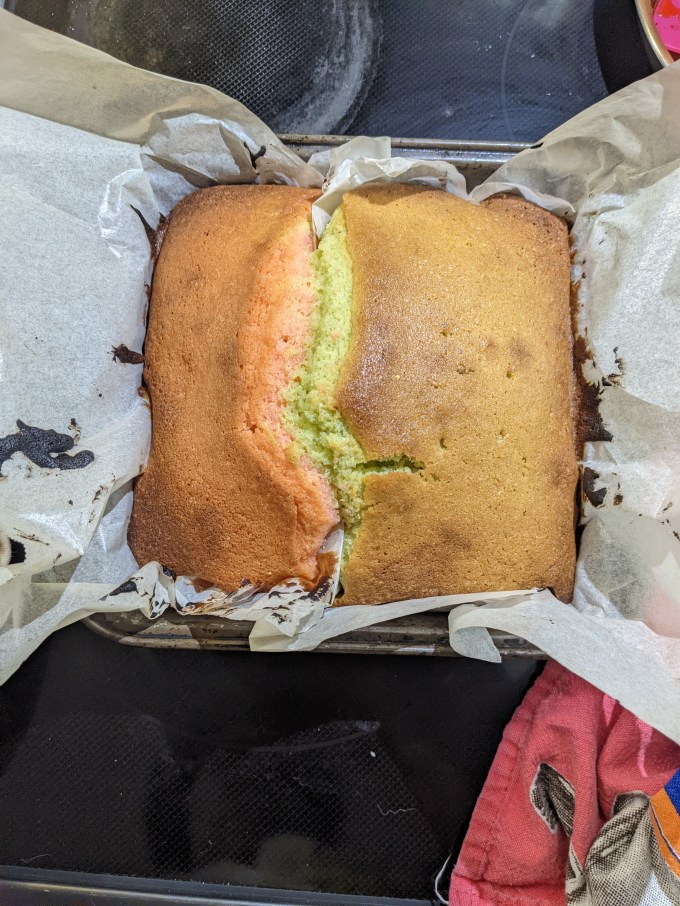
This bake is more of an exercise in cake decorating precision than it is a baking challenge per se. The GCBS recipe added a level of complexity to the technical by having the bakers put both batters in the same pan, separated by a piece of parchment. This was the only issue I really had with execution of mine. I should have put more effort into making the parchment shape and in getting the two halves of the batter even in the pan. I also didn’t quite have the right size pan. I considered baking the two sponges separately in loaf pans, which is the usual method for this cake, but I decided that wasn’t really aligned with the project. The result was one of my batters kind of ballooned out underneath the other, so I didn’t have quite enough cake to work with to make the final assembly the size it was intended to be.
I also had a lot of difficulty getting one of the batters to cook all the way through. This was related to the issue I had with using the parchment as a mould as well as the fact that my two batter halves weren’t perfectly equal. Not to worry! Baking is, as ever, a fake-it-til-you-make it pursuit. I just put the undercooked cake back in the oven and turned down the heat until I got it to the point where it was not going to collapse. Some creative cake cutting and decorating cover-ups and I was able to present a decent looking battenberg, even if I know I wouldn’t have fooled the judges. I also didn’t get my checkerboards looking totally square: they are more rectangular, but I still think this cake gives the general impression of a battenberg.
Step 1: Sponge
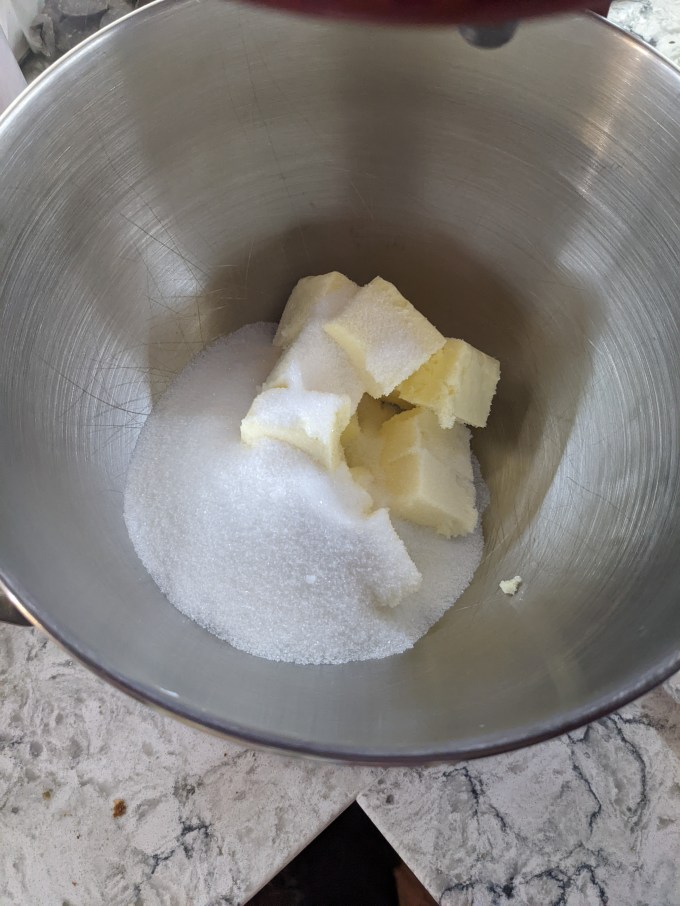
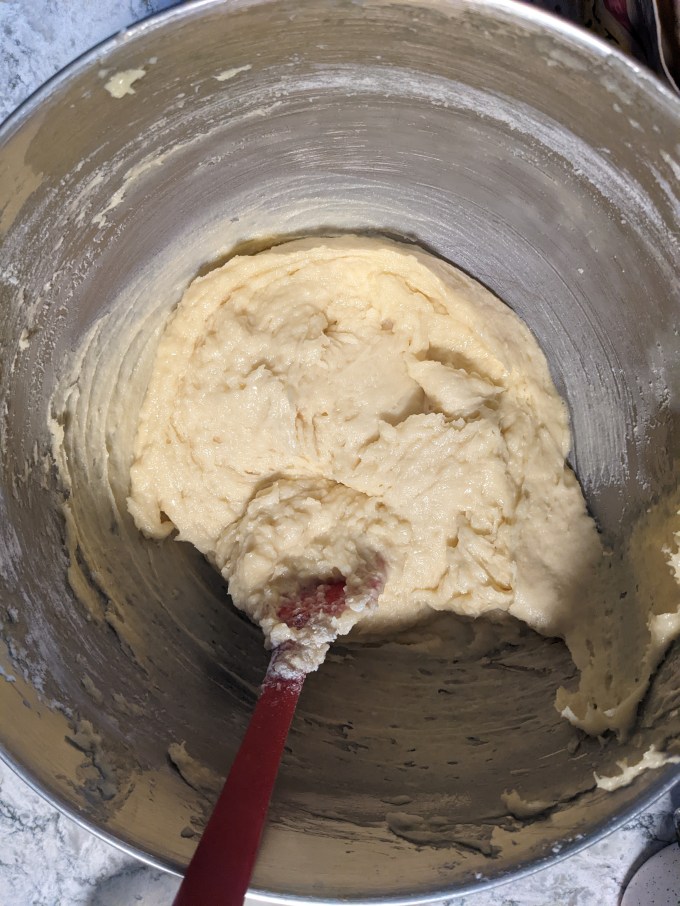
As I mentioned, this is a basic butter cake. This is a good starting point for people who don’t have a lot of experience making cake as it is very forgiving. It is possible to execute this cake without even using a mixer, if you are so inclined.


In this version with the added challenge of baking two cakes in one pan, the first step is to prepare the pan so it is divided in half by a folded sheet of parchment. I now realise I would have been more successful at this step if I had made the folded part much taller. The way I did it, the paper did not have enough structural integrity to hold the batter in place before it was cooked. I would say lesson learned, but there isn’t really a good reason to bake this way, in my opinion. Just use two pans or one pan twice like a normal person CBC. I think this was more of a reality-tv production choice than anything else to make the challenge harder for the contestants. There isn’t anything to learn here, so just move along. Work smarter, not harder as they say.
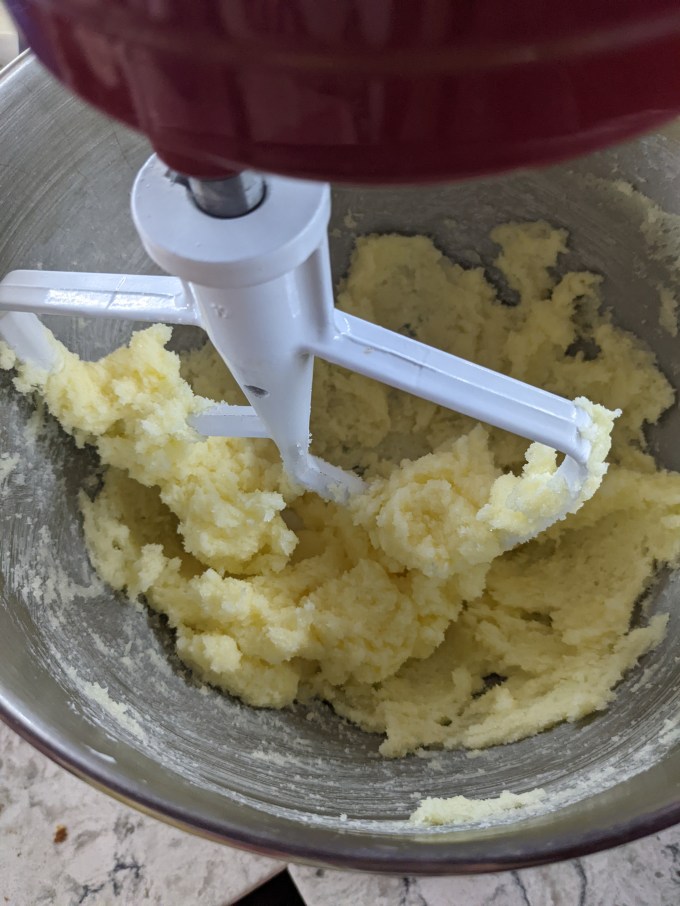
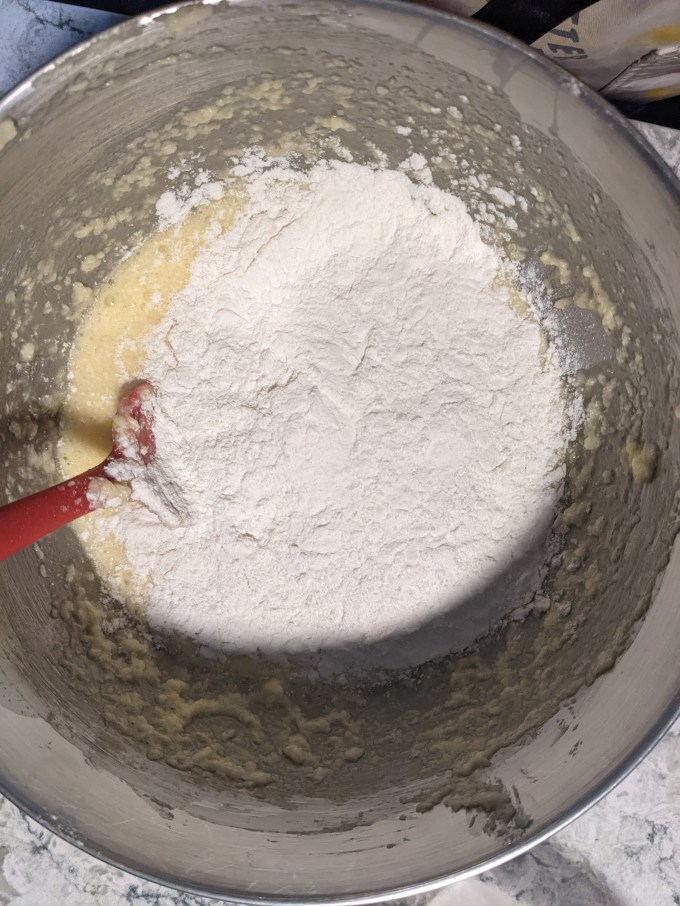
Butter and sugar are creamed together until light and fluffy. Eggs are added to make the batter base. Dry ingredients are folded in and then the batter is divided in two. Each half is flavoured and coloured, then turned out into the prepared pan.


Step 2: Assembly
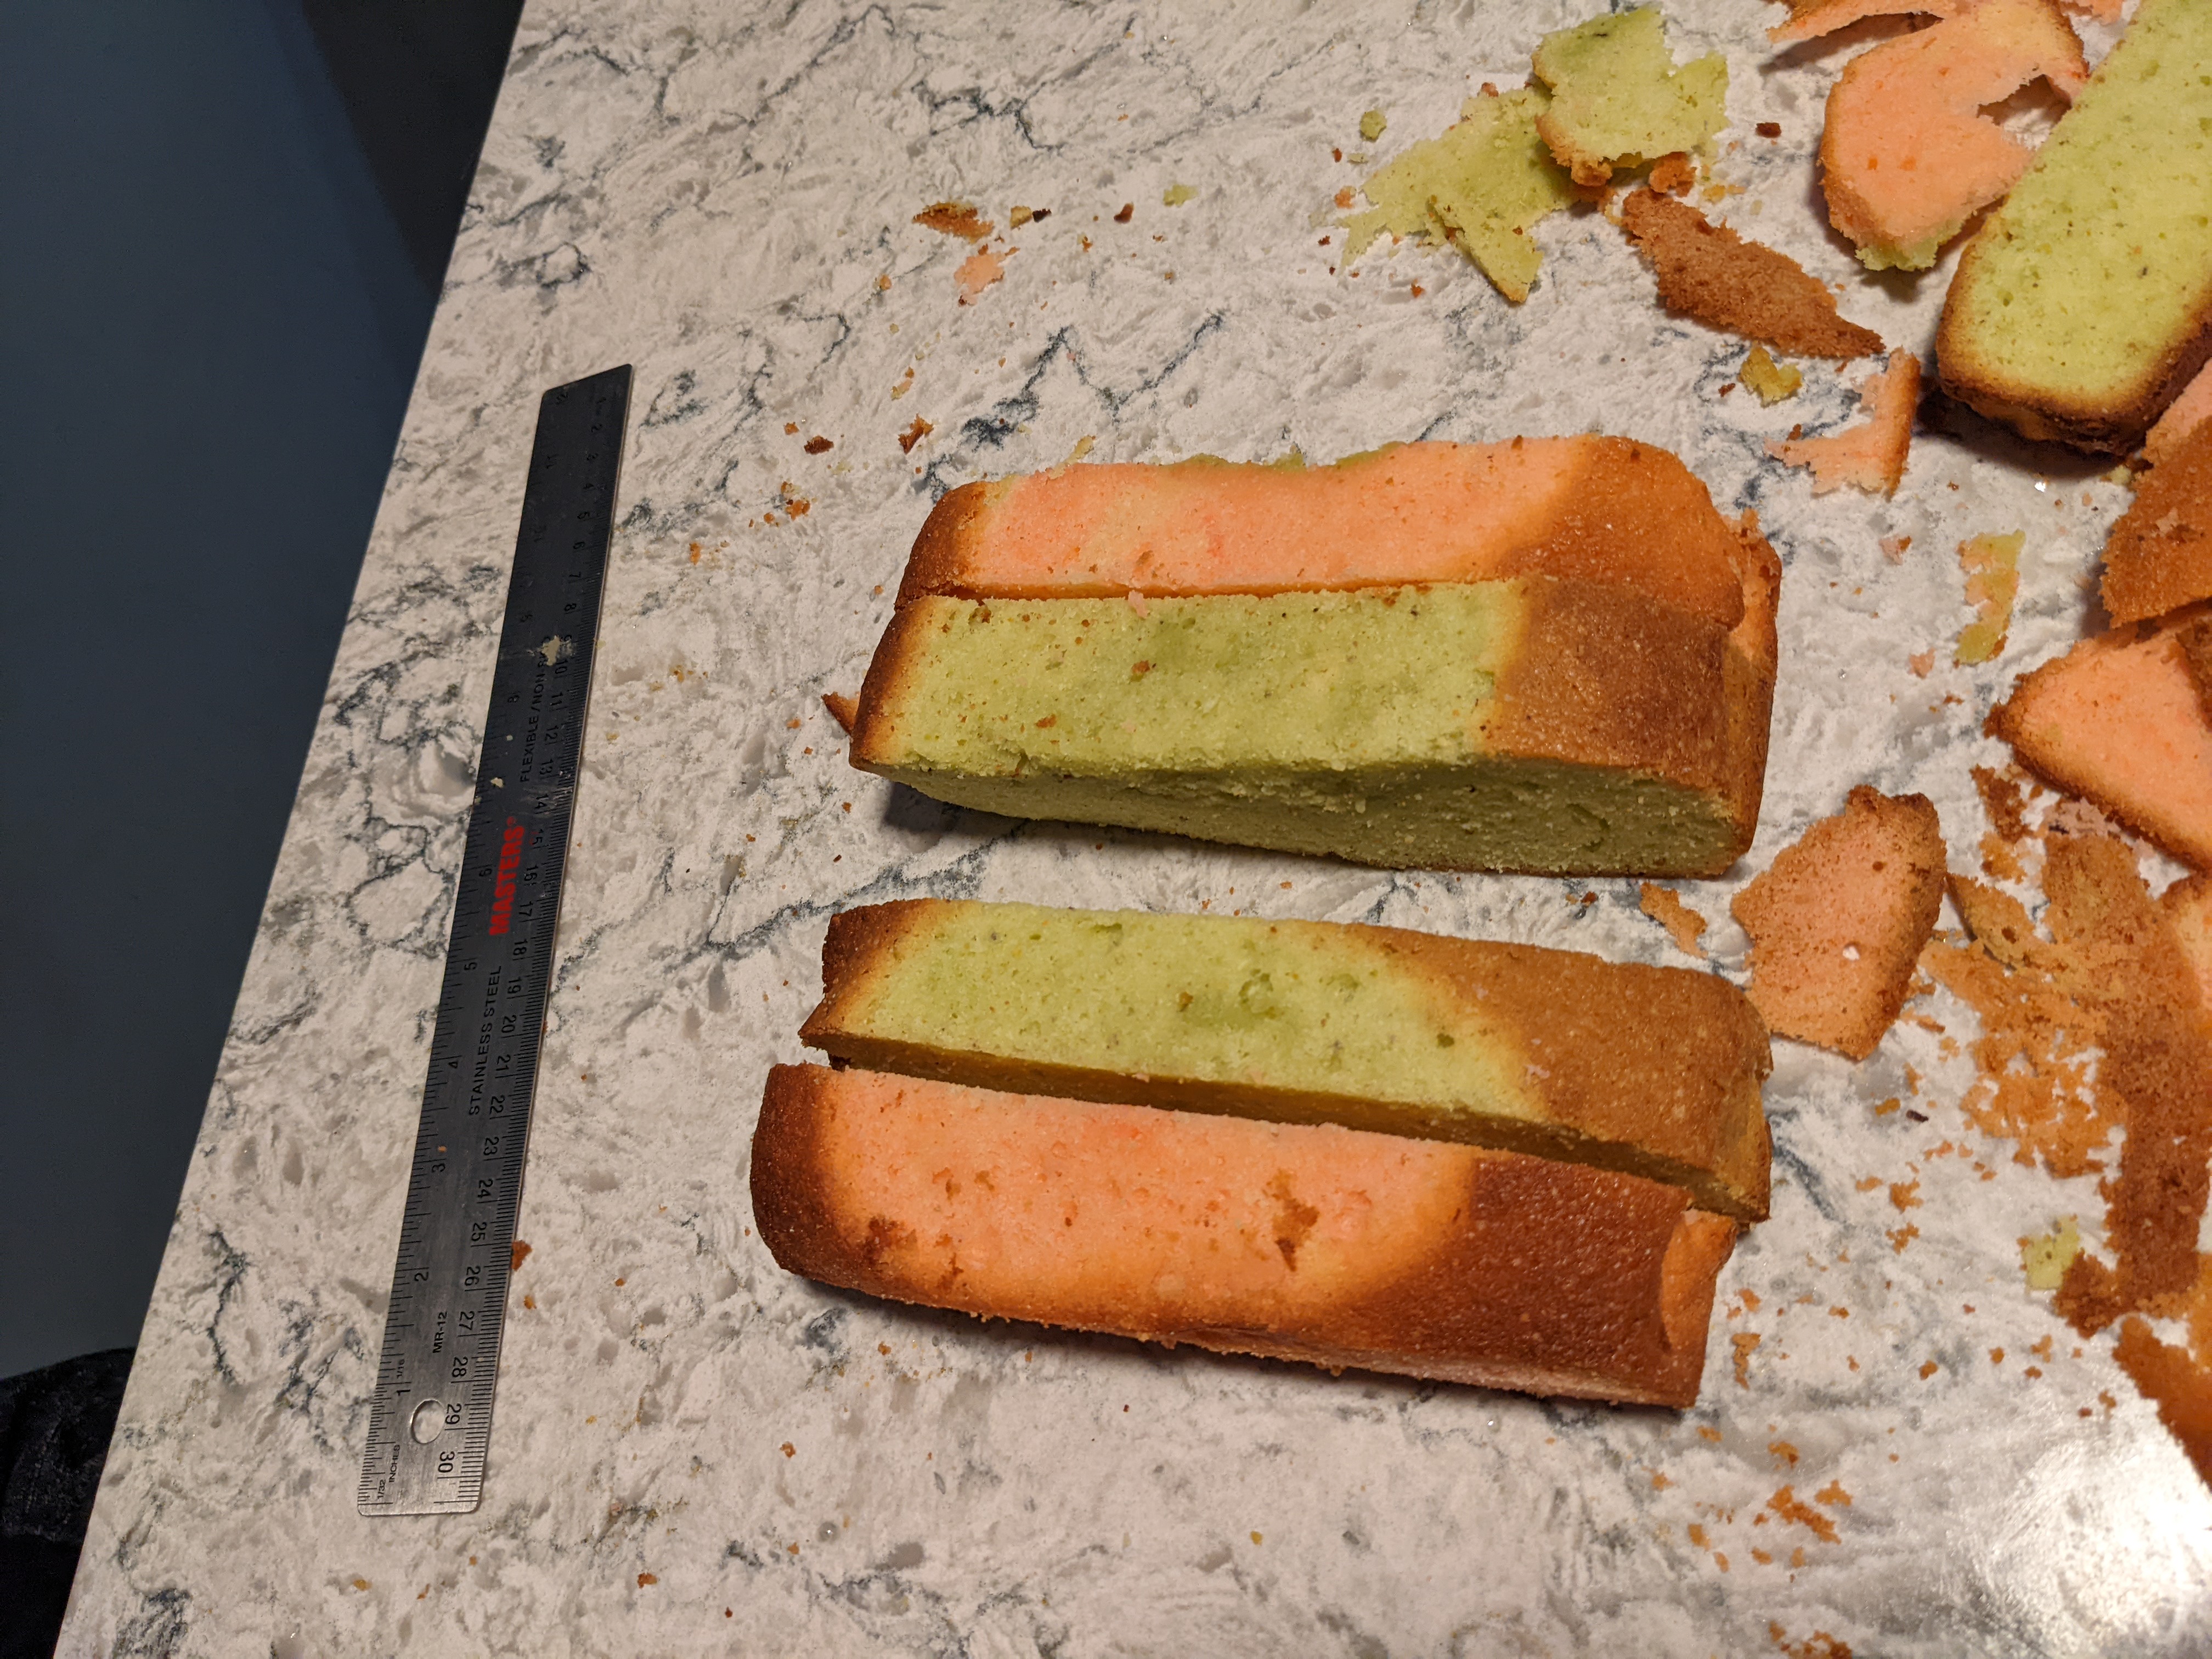
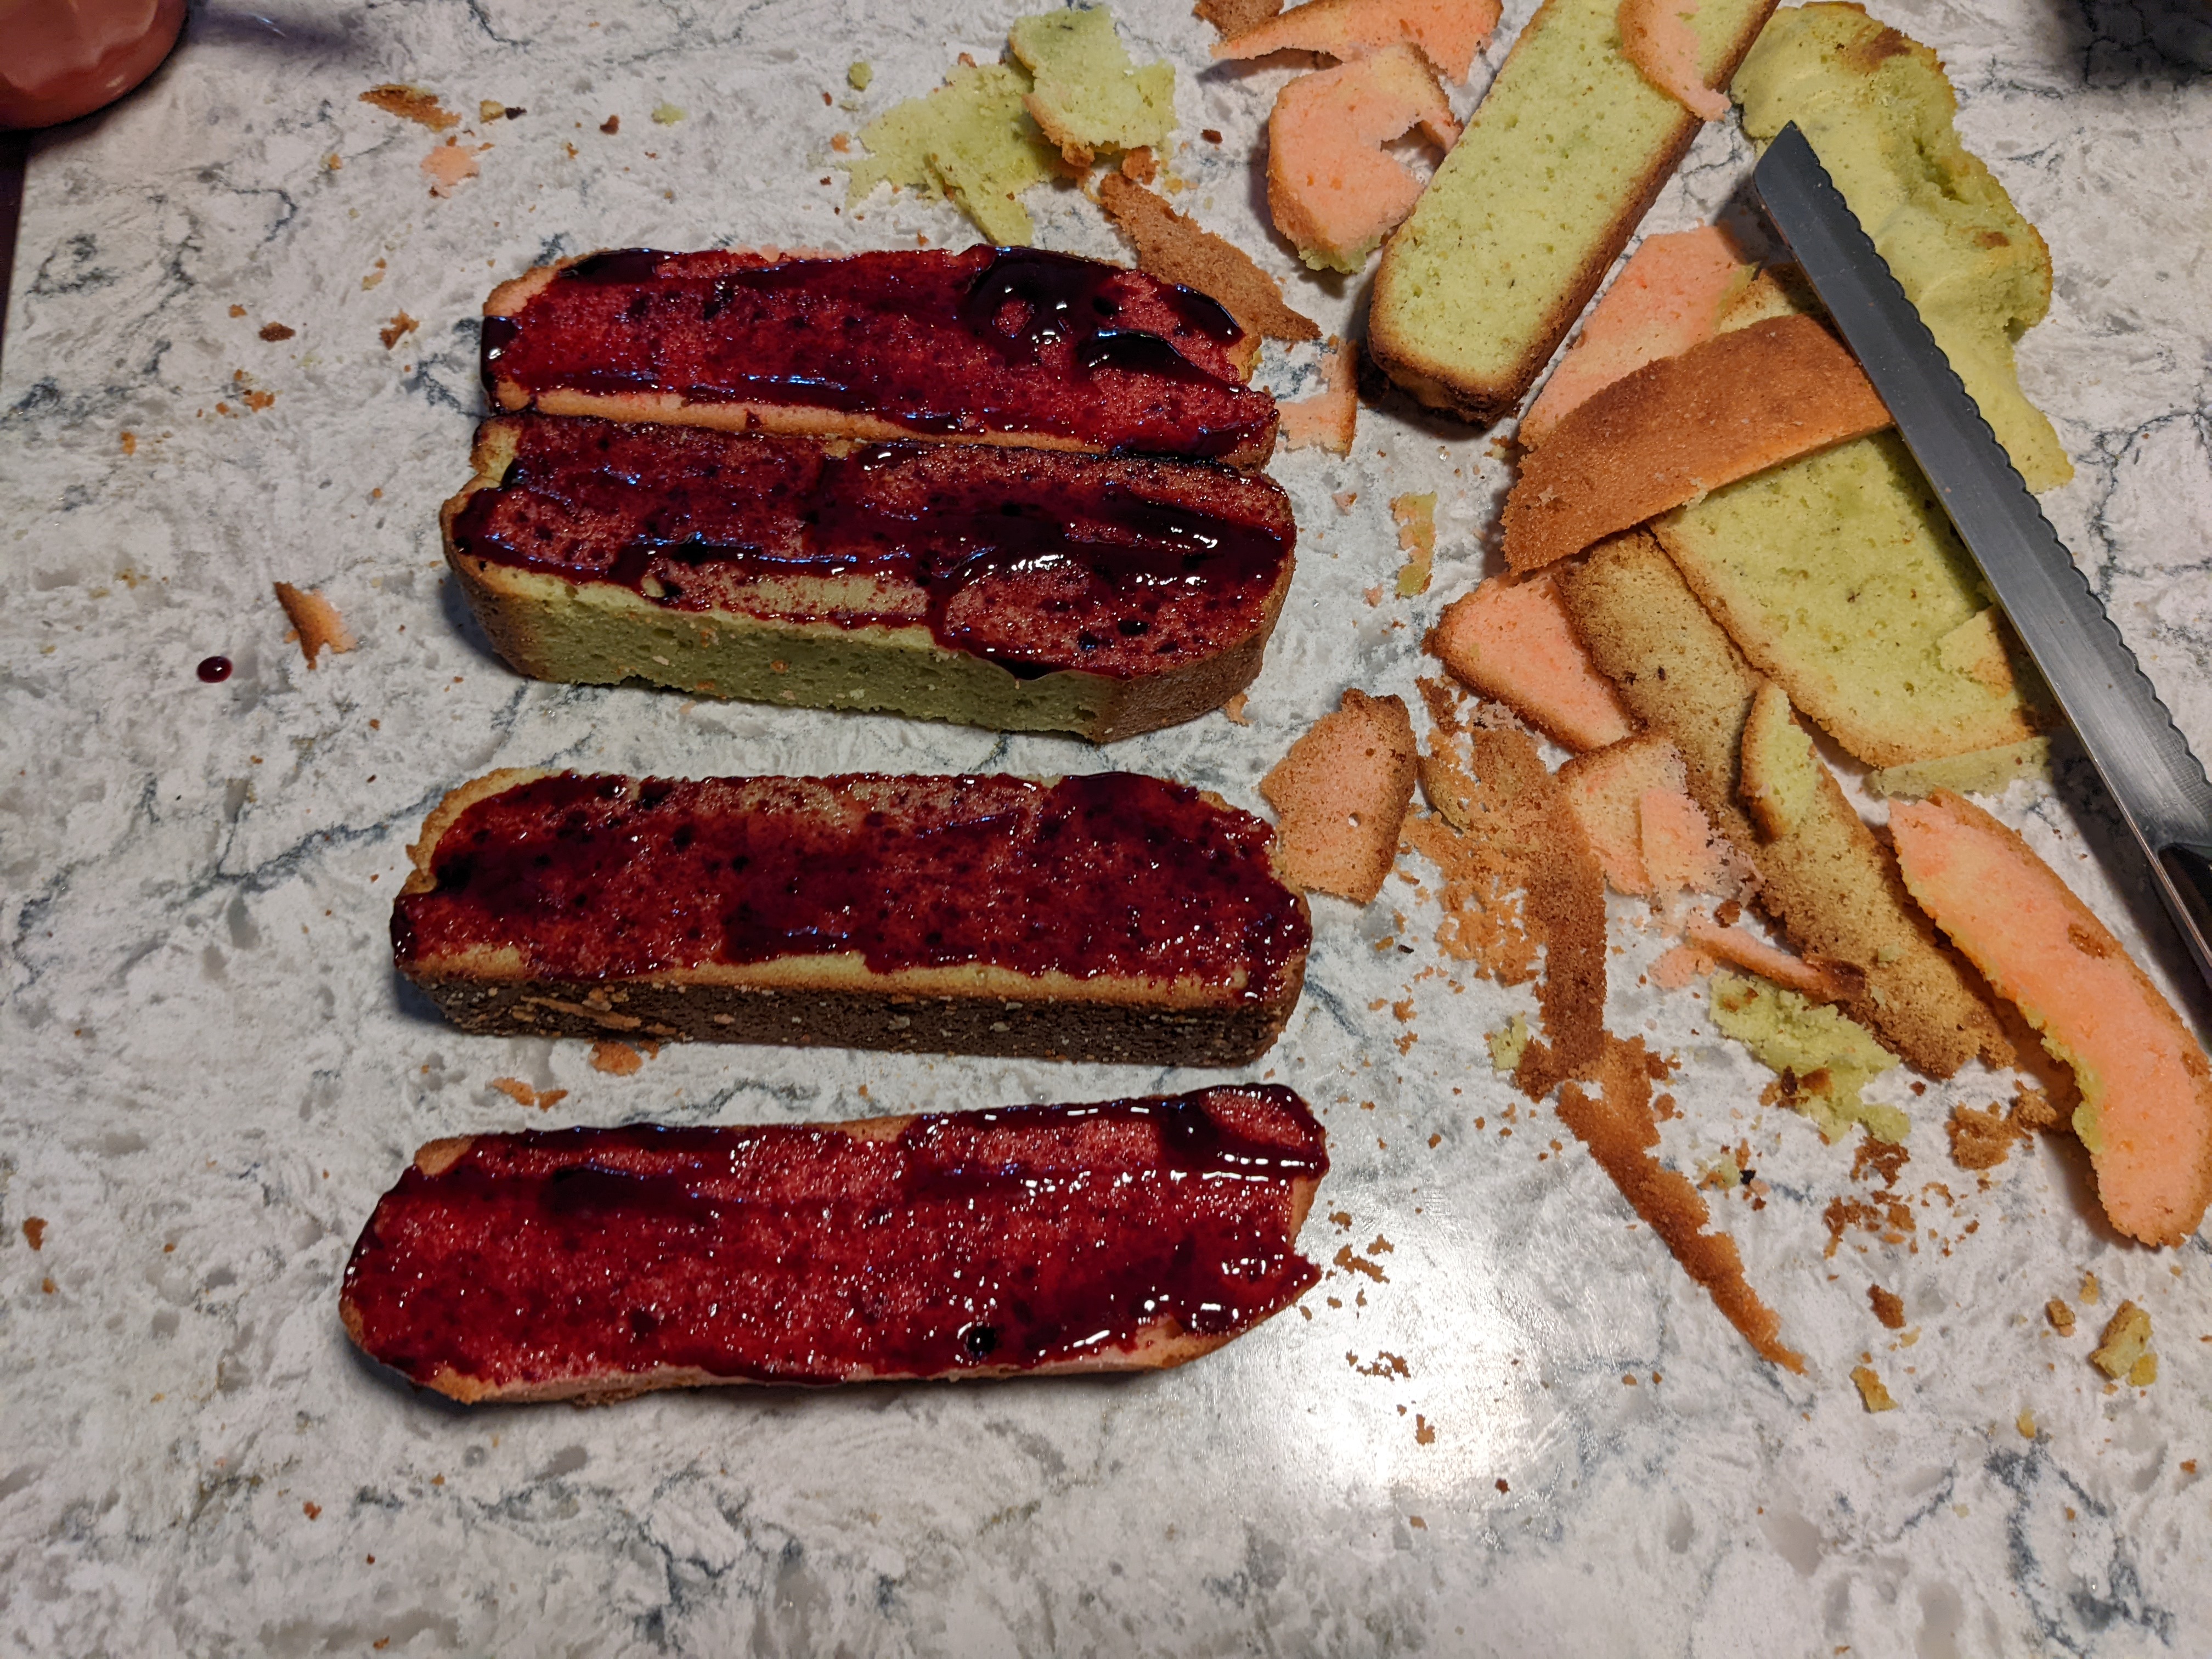
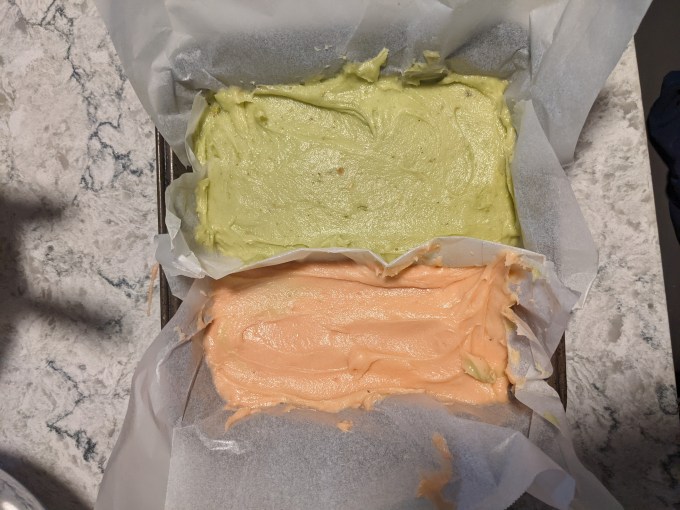
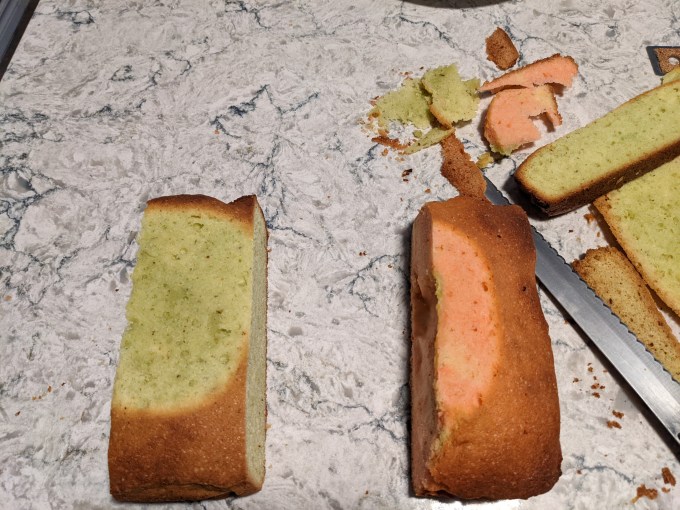
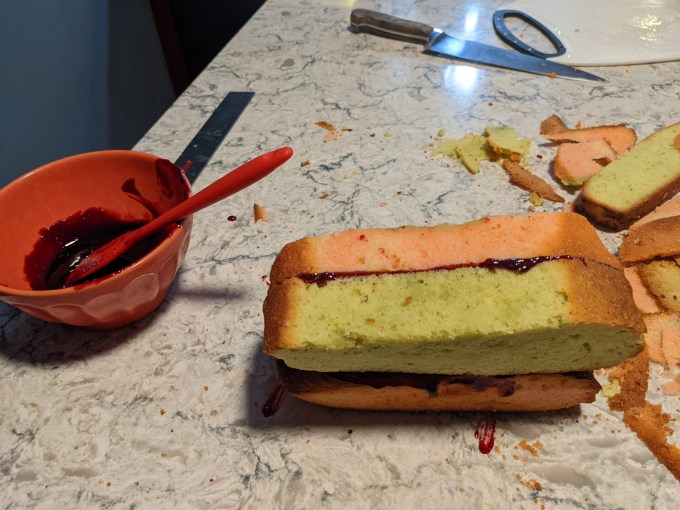
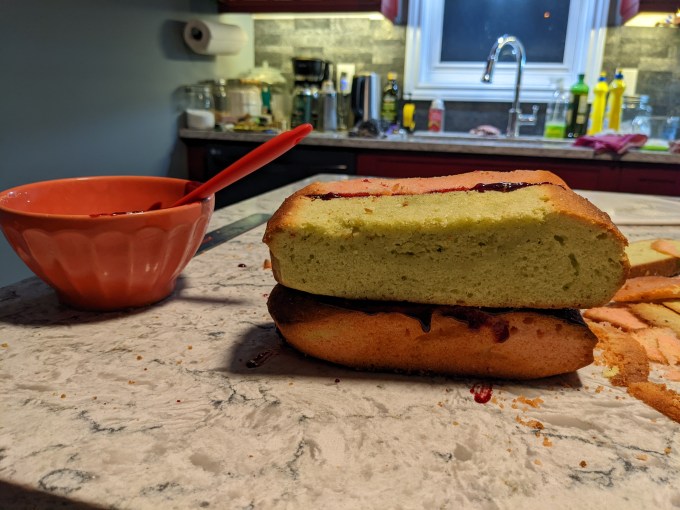
The cooled cakes are trimmed into rectangles of the same dimensions (or in my case, I did the best I could with what I had). The rectangles are then cut in half lengthwise to create 4 smaller rectangles which will make the checker squares. The four rectangles are coated on all sides with jam and stuck together.


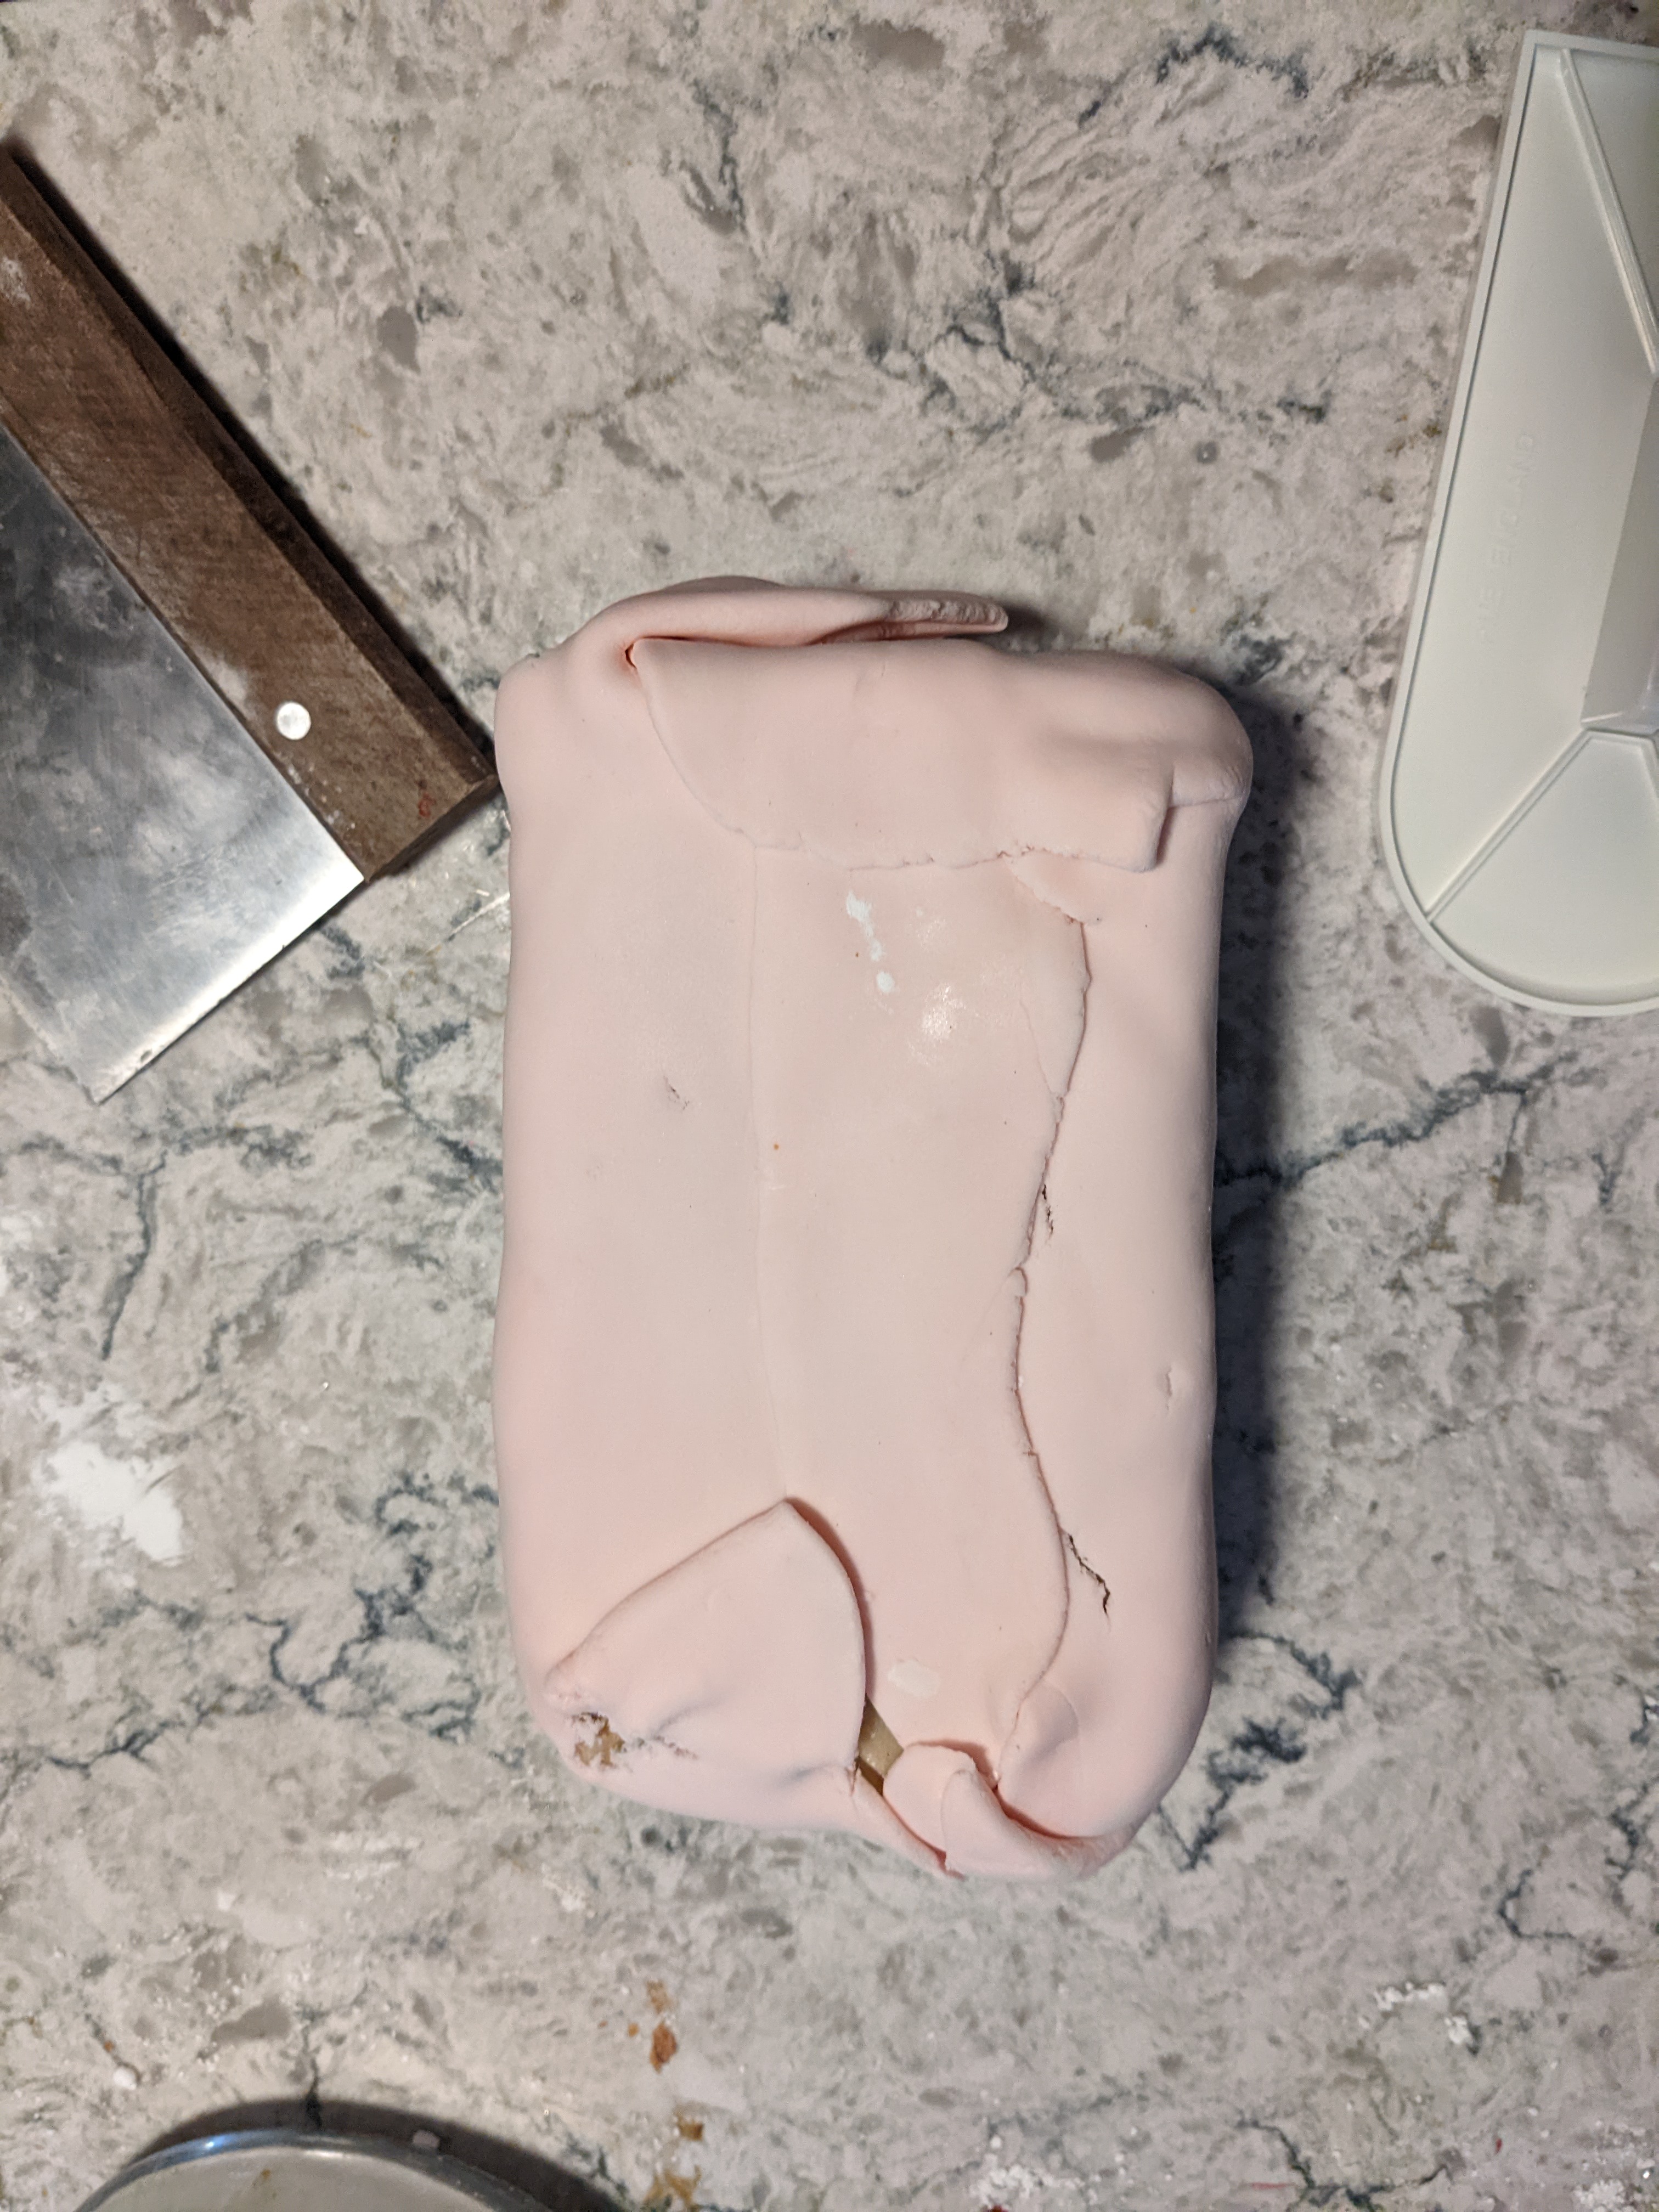
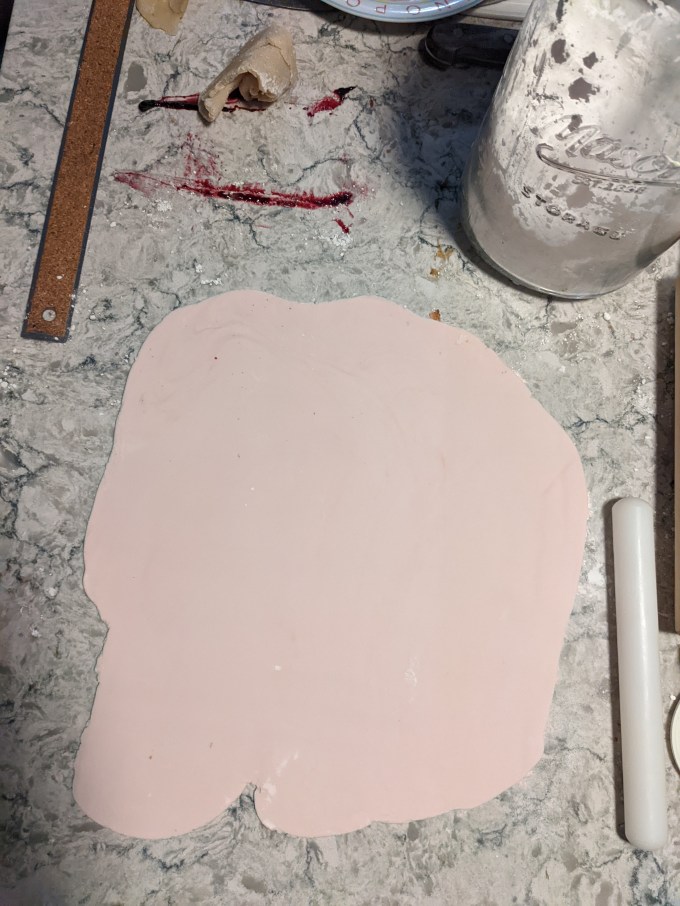
Once the cake is built, marzipan is rolled out and wrapped around the outside. In this version, prepared fondant is lightly coloured with a touch of pink and also rolled up and wrapped around the outside. The ends of the cake are trimmed off for final presentation so the checkerboard is visible and all that excess marzipan and fondant is removed. And that is all there is to it! Short and (incredibly, grossly) sweet.


Gallery


This is a cute little cake that is easy and quick to throw together. As always, the idea of a cake wrapped in marzipan OR fondant is unappealing to me, so the idea of putting both on just seems like overkill, but who am I to argue with the CBC? In the meantime, we are getting close to the end of this first batch of technicals, and what a journey it has been! See you next time!
Hey, bakers! Check out my BAKER’S PANTRY index if you want to deep dive on specific ingredients when attempting this bake for yourself
