Here we are again, Friends and Fellow Bakers! Today I am talking about the Bakewell Tart (recipe here) which was featured on Season 4 Pastry Week of GCBS. The Bakewell tart is a modified version of the British pudding of the same name. As with any tart or pudding, there is some flexibility on how to put it together, but the basic elements are frangipane and jam. This version is topped with icing sugar glaze and is made in a tart pan on top of sable pastry crust.
I remember the first time I saw this episode, I was unimpressed with this tart. I was surprised they selected it as the technical for pastry week because it didn’t look very challenging. I was disinterested in making it because it didn’t look appetizing to me, either. After I made Pithivier, I changed my tune a bit because the filling for the two pies is the same and that shit was delicious the first time around.
I decided to complete this bake on the (Canadian) Thanksgiving long weekend because I was also making a large batch of Halloween cookies (here is that post, if you missed it) that weekend so I figured I needed to keep my technical challenge short and sweet. Much like the nefarious Creme Caramel episode of GCBS, this was an episode where the challenge wasn’t so much in the bake itself, but in the fact that the contestants had the bare minimum in terms of instructions. Since I, as usual, had all of the information I needed, this bake was as easy as it looks for me to do.
With that being said, I did learn a thing or two putting this together. I have never actually made sable pastry before, but I felt confident in the basic principles. Sable is similar to short dough (see my post about rugelach for more info about short dough) but also has ground almonds in it which prevent it from fully incorporating into a uniform, solid mass. The dough holds together well enough to manipulate when it is raw, but once it is cooked, it is very crumbly, like sand (sable is French for sand).
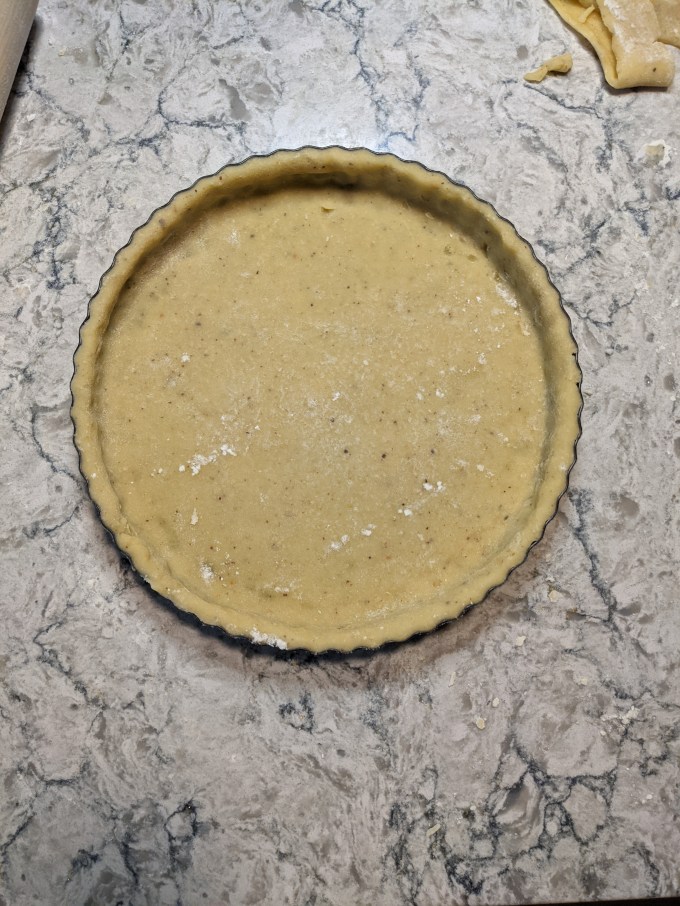
I have also never used a proper fluted tart pan before, which I bought specifically for this recipe. I got to practice some proper fonçage, which is the technique of rolling out the dough and pressing it into the tart pan to line it. The nice thing about sable pastry is it is fairly forgiving, so this wasn’t particularly difficult to do. It’s important to practice the basics though!
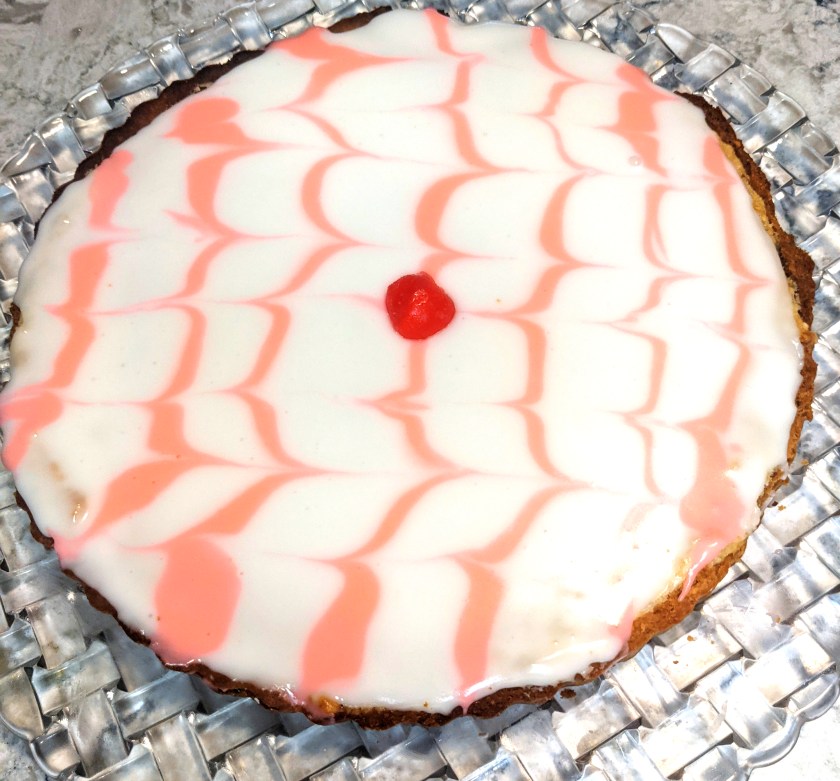
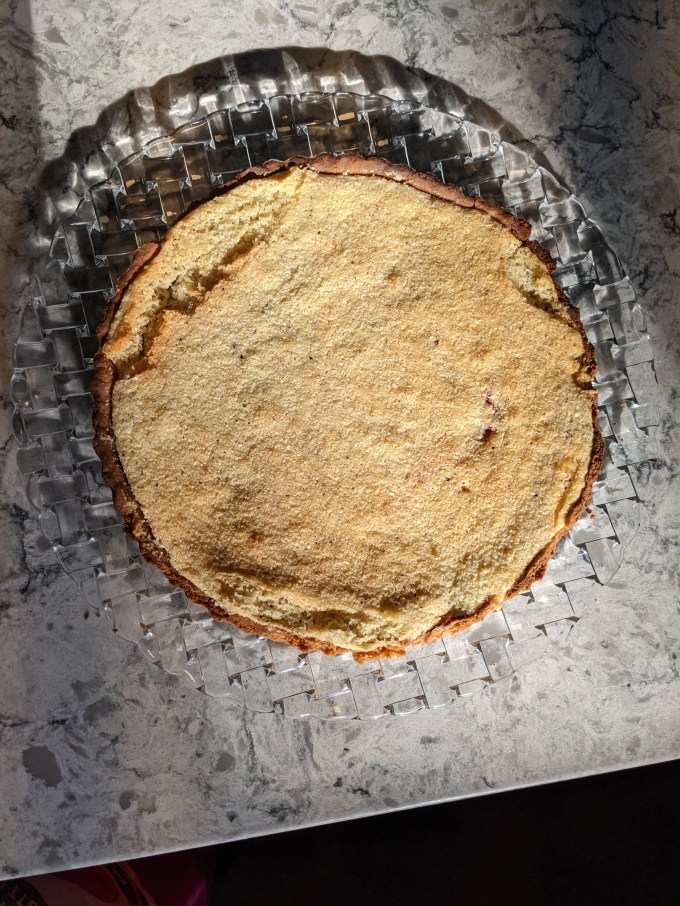
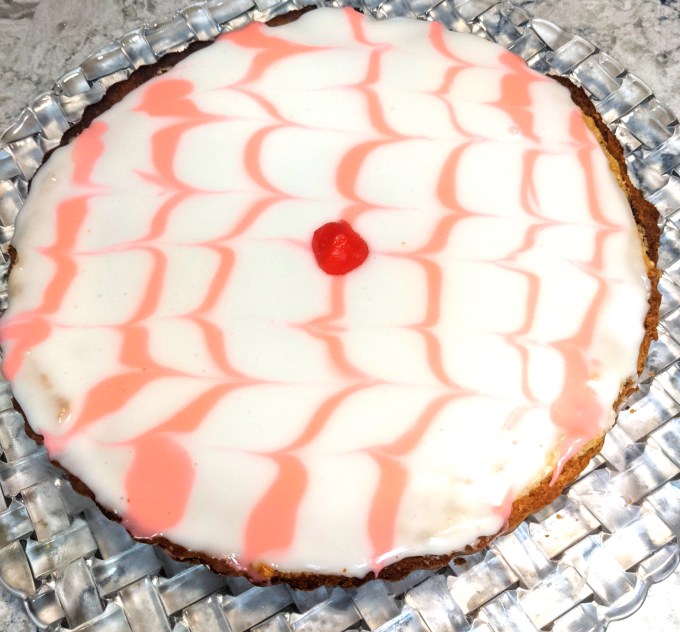
I also learned about working with this type of pan, since it was my first try. I noticed in the episode that most of the contestants wrapped their tart pans in foil at some point. I learned a little too late as a first timer using a fluted pan that this helps prevent the edges from darkening too quickly. My pastry was fine and my tart wasn’t burnt, but you can see in my photos that my edges are a bit dark, and they aren’t as tall and dramatic as they are supposed to be because I trimmed the worst of the dark edges down before I filled the tart. I made the right decision in terms of final eating experience, but once again I find myself presenting an ugly duckling here on the blog. Win some, lose some.
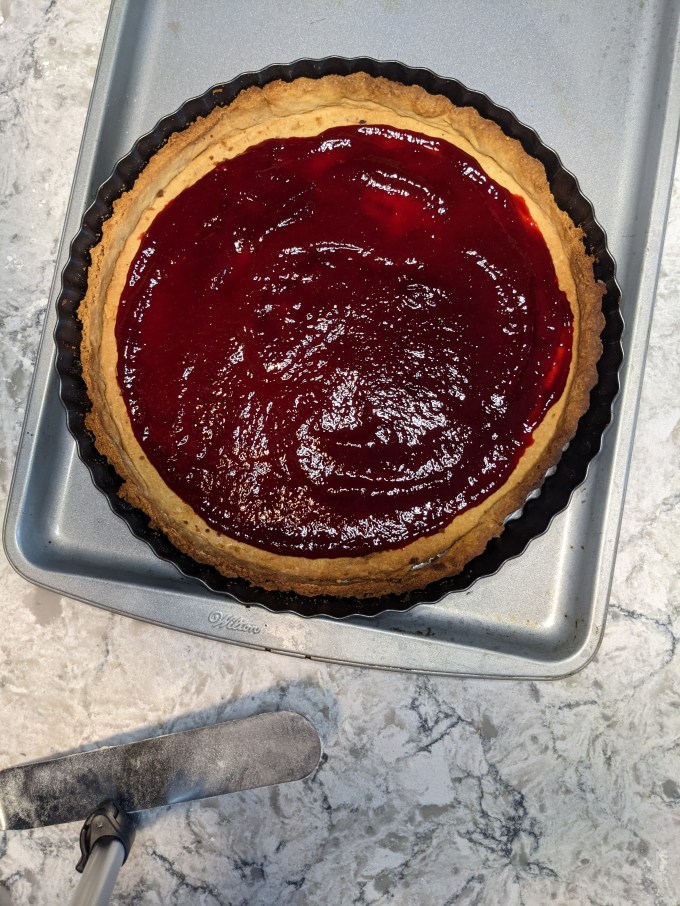
I also didn’t do the best job with the glaze. Since I cut down the dark edges, the volume of the glaze was probably a bit too high for the final tart, and I didn’t have much in terms of void space to fill. This resulted in my glaze overflowing the sides of the tart a bit, but at least I got the feathering pattern to come out.
The final result of this tart was about what I expected. The frangipane and jam filling is a killer combination and the sable pastry is a nice quick short crust to have handy. The glaze added nothing to the final eating experience for me. I think it’s fair to say I don’t really like icing at all so there was no way a half inch layer of icing sugar glaze was ever going to be something I am getting excited about.
Finally, in the interest of transparency: the contestants on the show had to do this bake with a hand mixer, to which I said: NO THANK U. This doesn’t make a huge difference, I think it was really a matter of the recipe being small volume than anything. The only element that required a mixer was the frangipane, and it is so forgiving, you could accomplish a good frangipane with a wooden spoon if you really put your mind to it. My point is I stand by my choice to use my stand mixer for this bake because doing it with the hand mixer doesn’t require different or better skills than using the stand so why bother.
Step 1: Sable Pastry
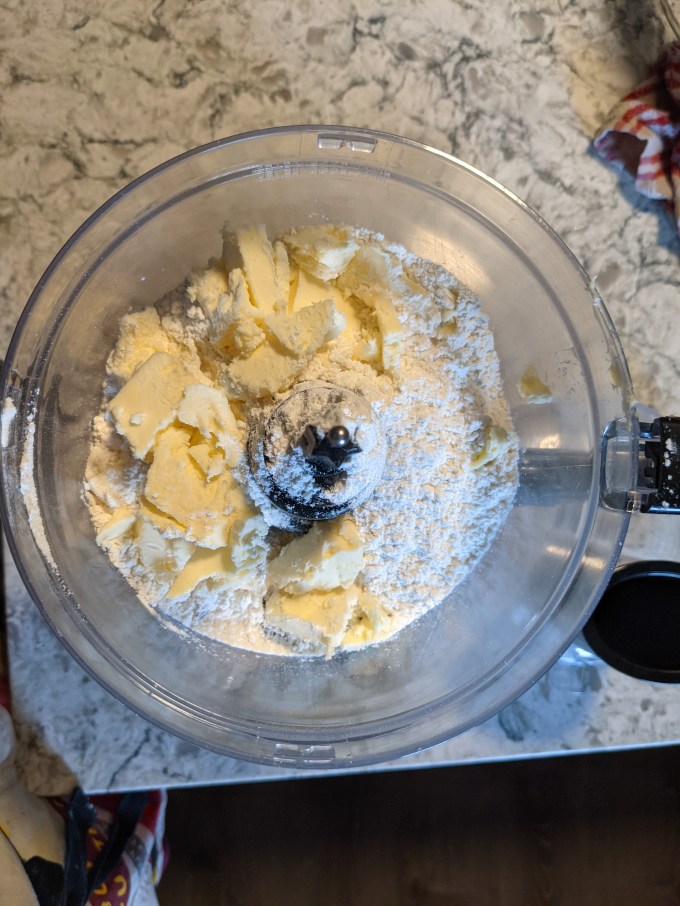
This is basic short dough method with added ground almonds (aka almond flour). Cold butter is blitzed with the dry ingredients to coarse crumbs. I prefer to do this method in the food processor, but there are lots of variations: grating the butter in, two knives, a pastry blender. Just chop that butter up and keep it cold.
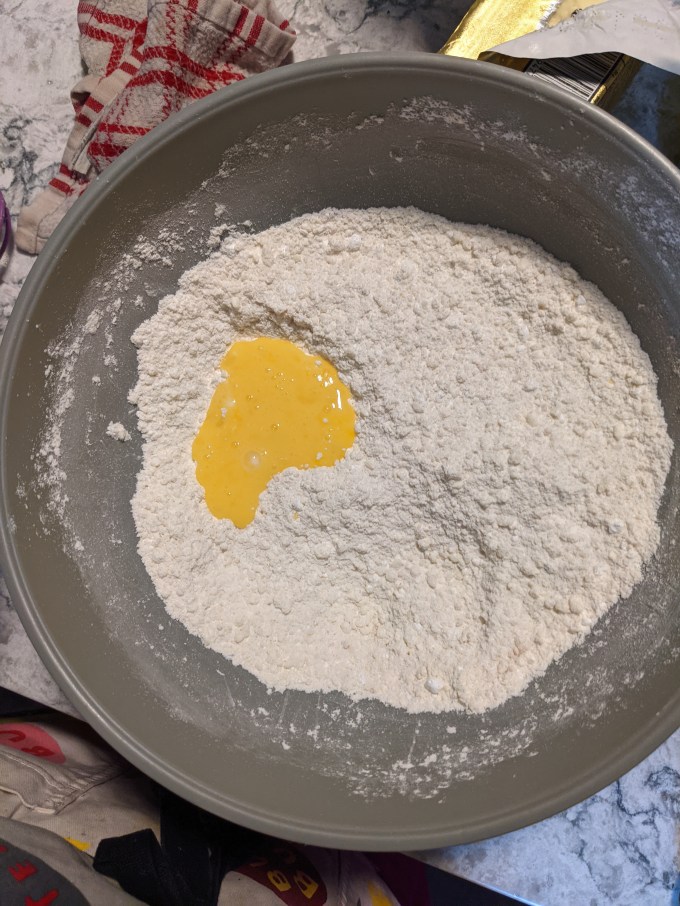
Cold liquid is added to bring together. In this recipe, the liquid is an egg, which I like. I usually add an egg to pie dough. It enriches the dough a bit and I find it a bit easier to work with than just water because the egg is sticky. As with any short dough, the key is keeping everything as cold as possible and taking care not to over mix.
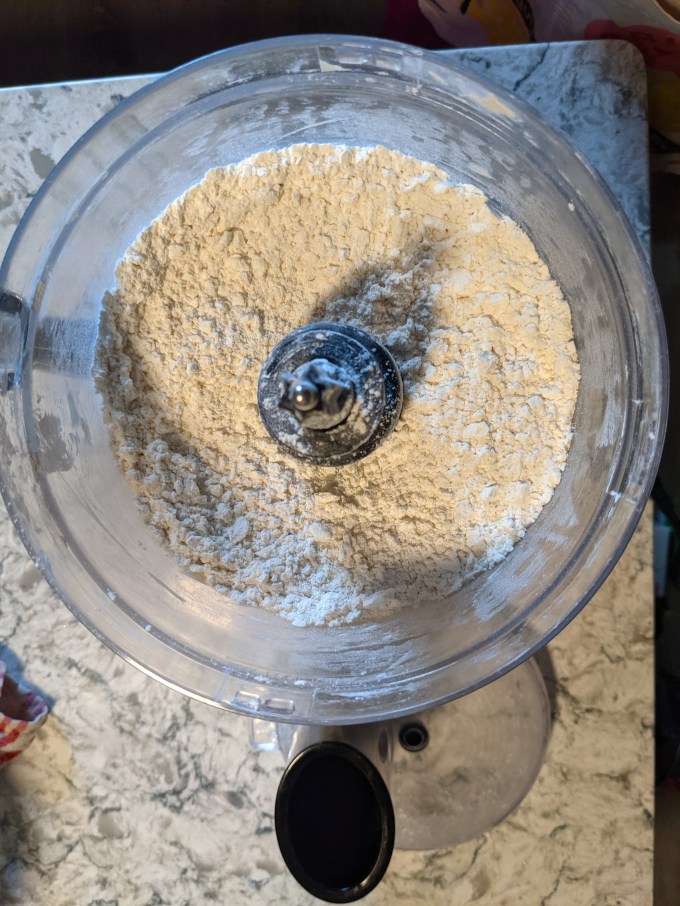
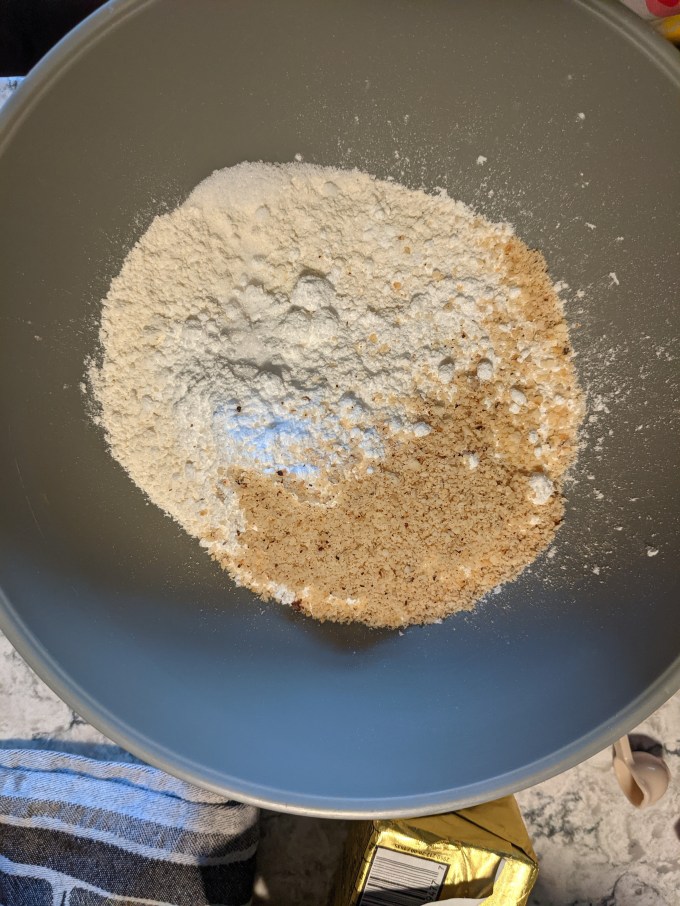
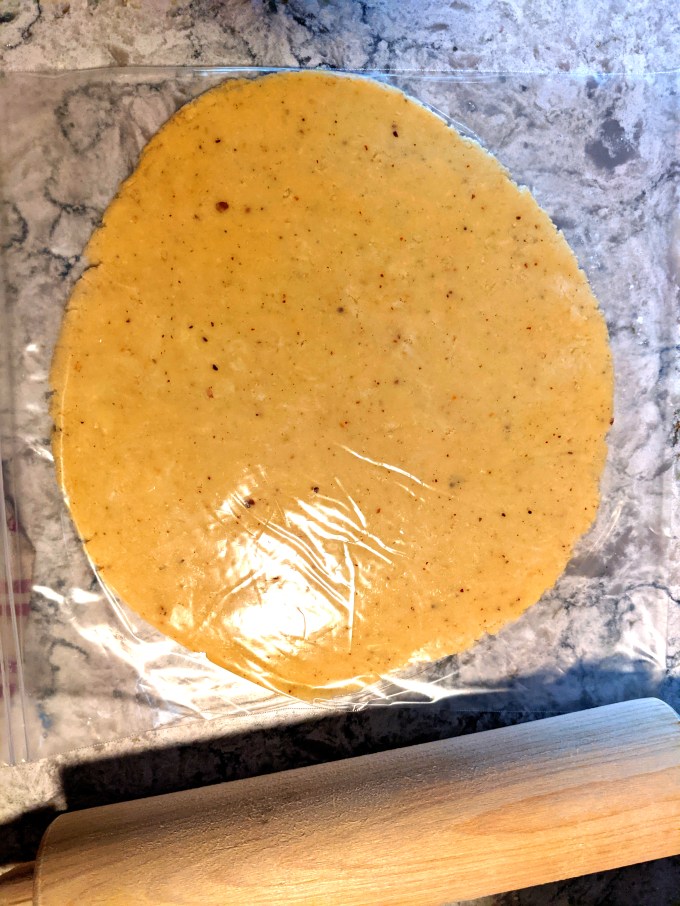
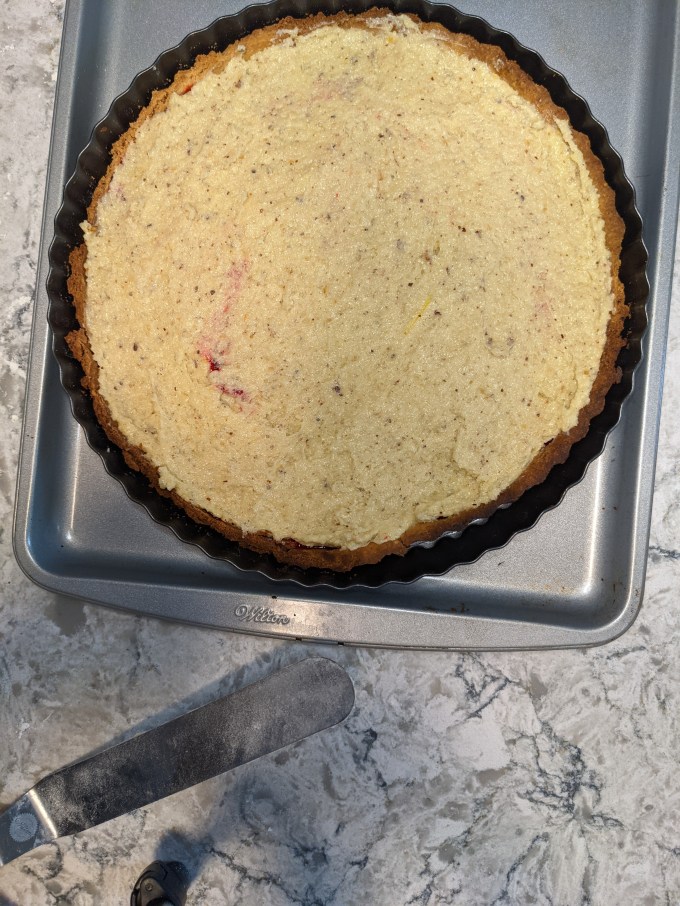
Once the dough is holdling together, it is shaped into a rough disk and put in the fridge to rest. You might notice some brown flecks in my dough and frangipane: I had a mixture of leftover ground hazelnuts and almonds from my first blog bake (!) that I wanted to use up since they have been sitting around for 6 months. The flecks are coming from the hazelnut skin.
After chilling, the dough is rolled out and then pressed into the bottom and sides of the pan and then pricked with a fork. The method with the fork is called “docking” and is used for short doughs to prevent too much puffing and the dreaded soggy bottom. As the water in the dough heats, it evaporates and turns to steam. If the steam doesn’t escape quickly enough, it will either inflate the dough and cause an unwanted puff, or it will get trapped and make the crust soggy once cooled.
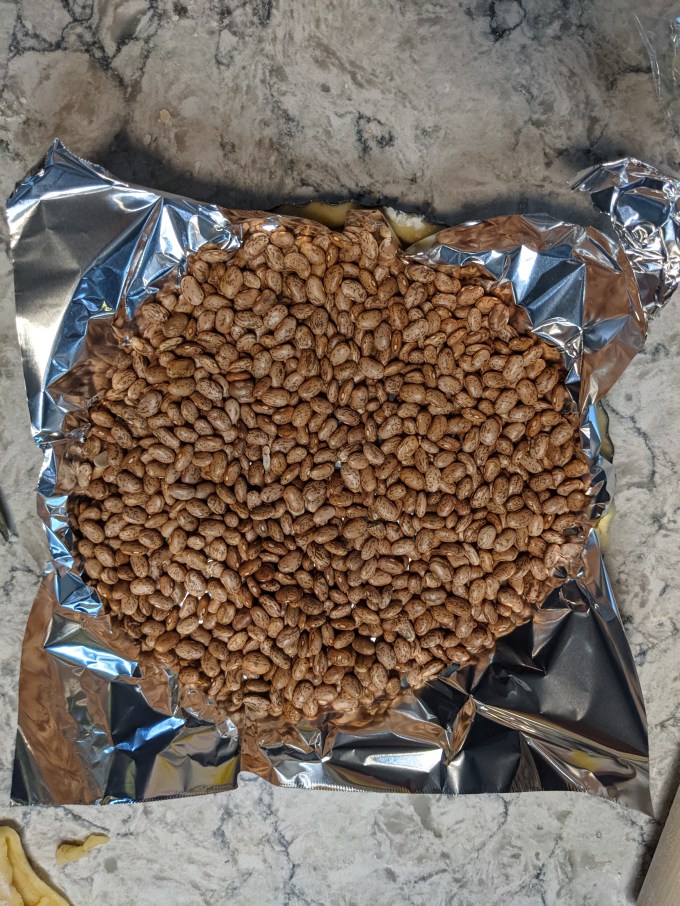
The moulded crust is then blind baked. Blind baking is the process of pre-baking a pie crust so it is cooked properly before the filling goes in. Tinfoil or parchment paper is placed on top of the prepared crust and then filled with either pie weights or dried beans. The crust is put in the oven to bake partially before adding the filling. Blind baking is also important to prevent soggy bottom and to ensure the pie crust is cooked all the way through.
Step 2: Filling
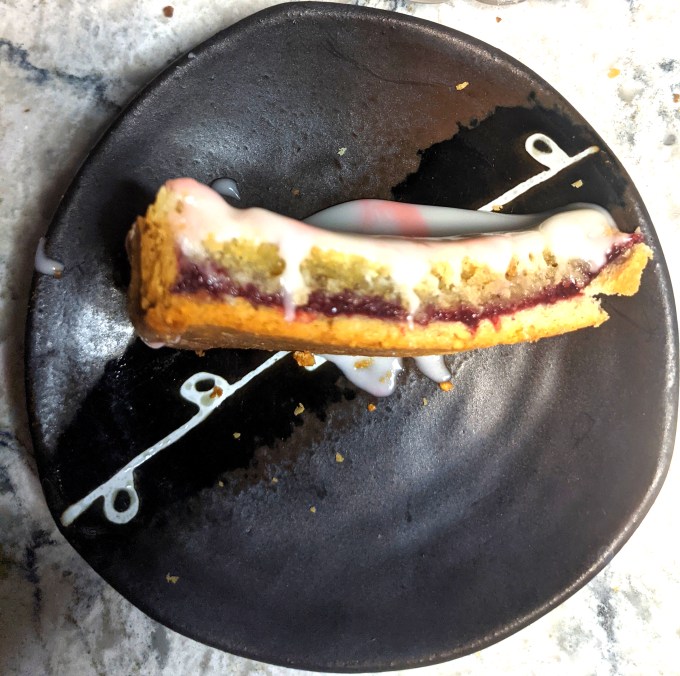
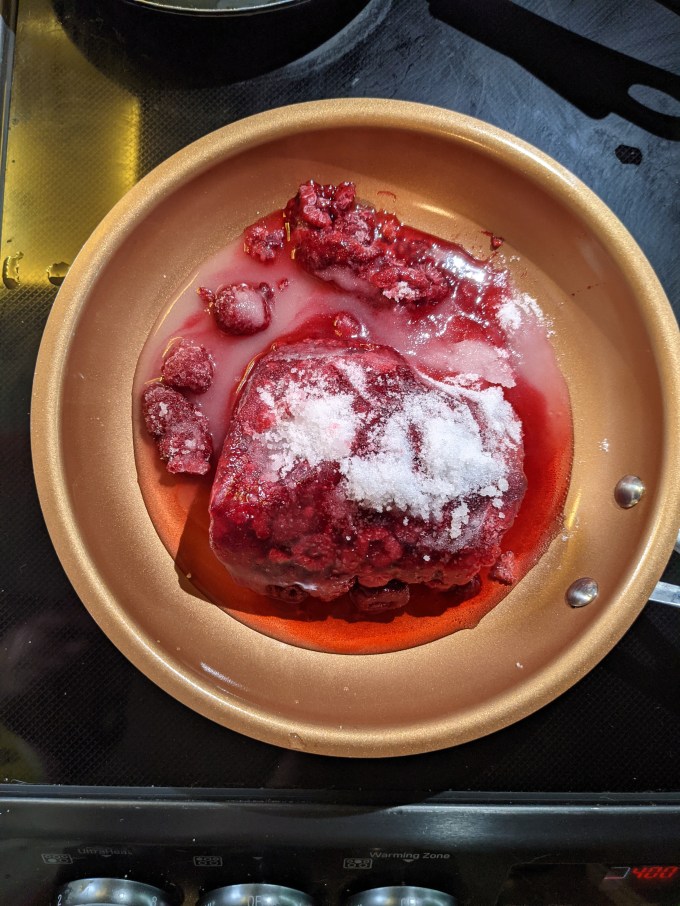
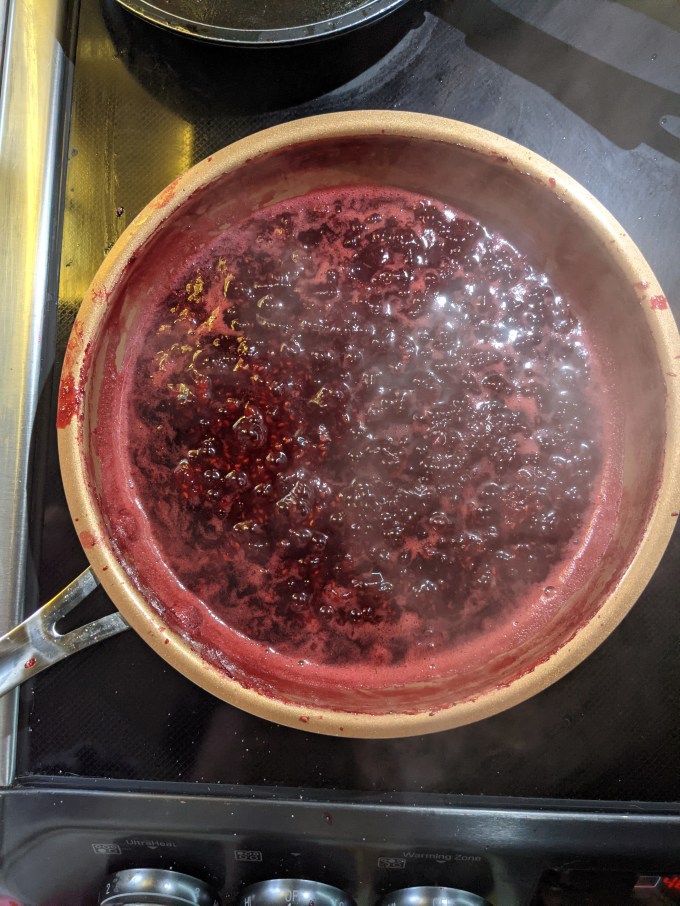
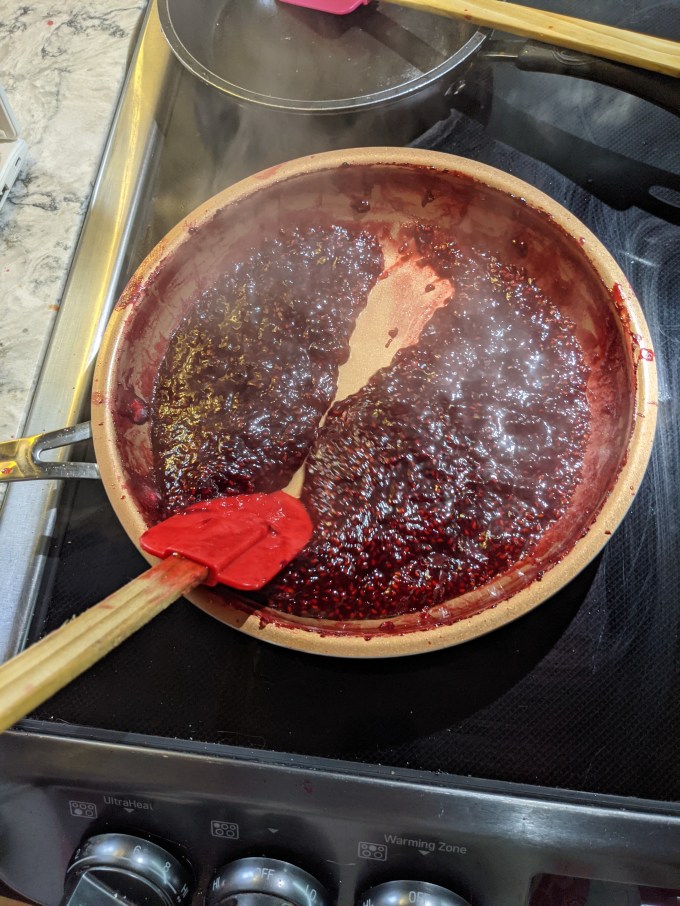
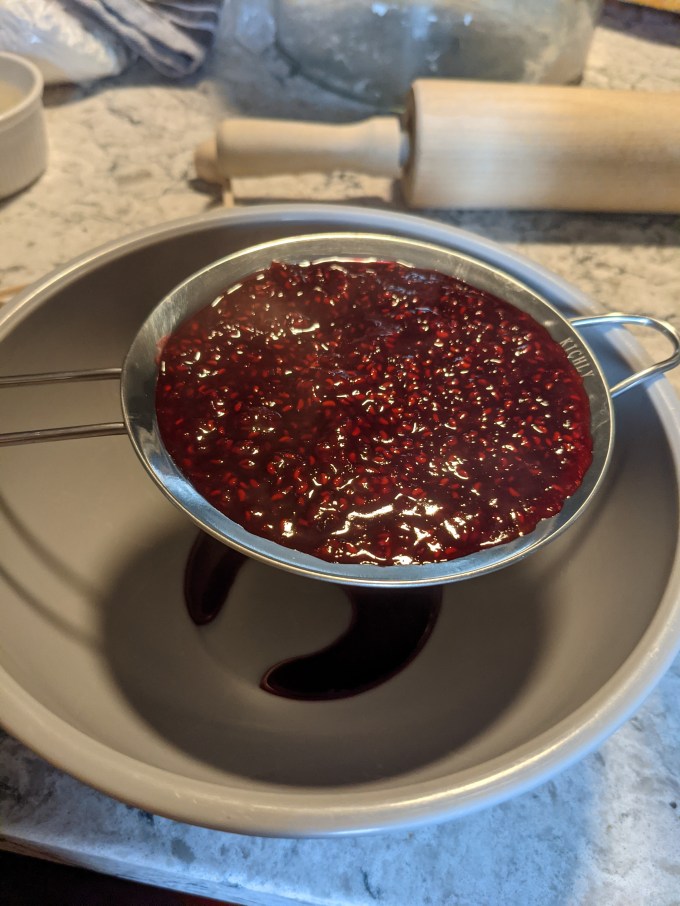
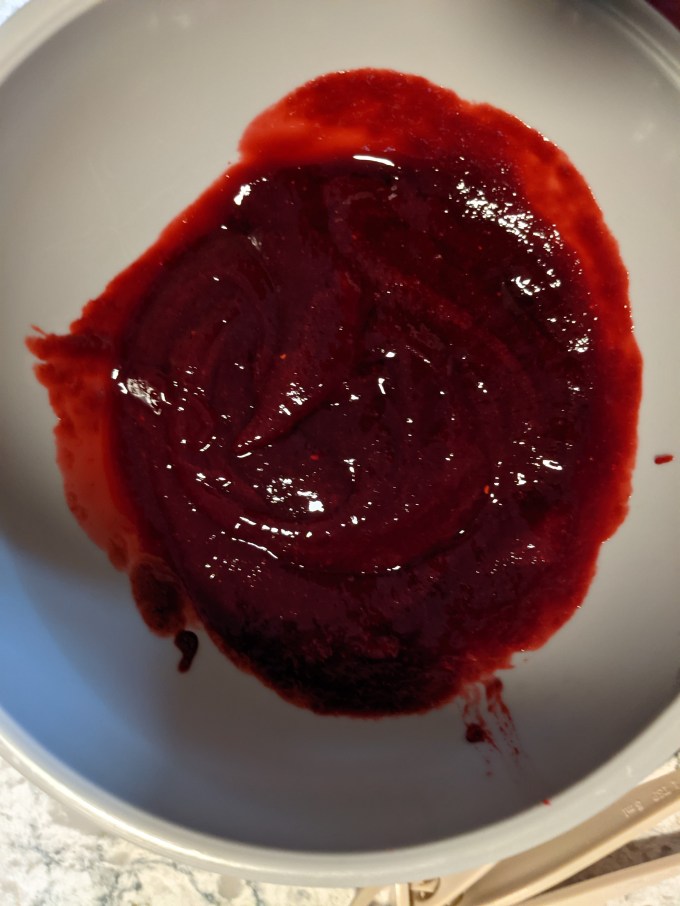
Once again we have raspberry jam which was also featured in the Pithivier, the Marshmallow Puffs, and the Swedish Princess Cake. This version did not feature jam sugar (pectin) but was a simpler variation using just fruit and sugar boiled down to a nice paste. The seeds are strained out and that is all there is to that.
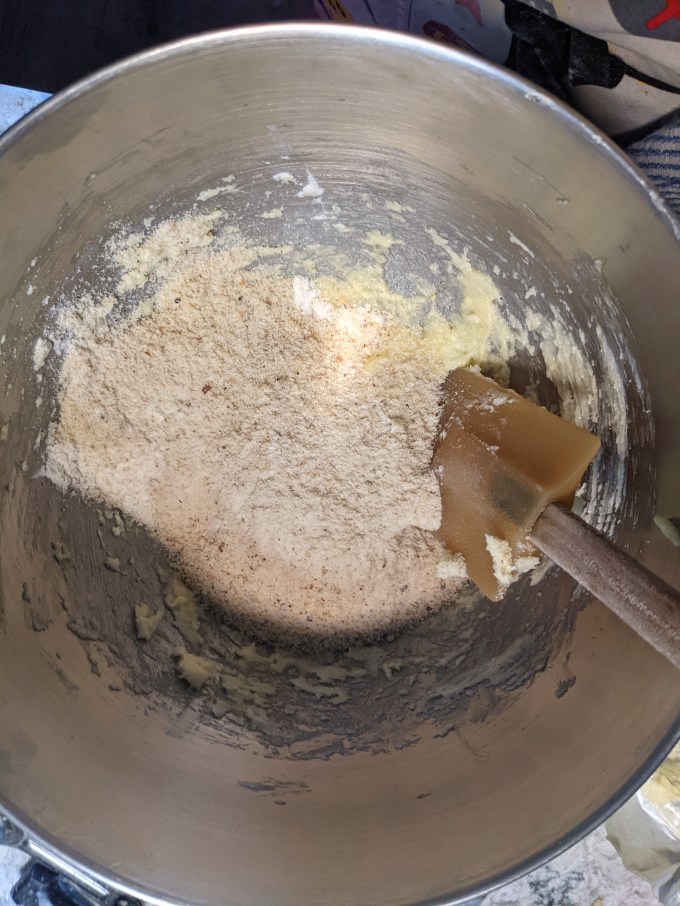
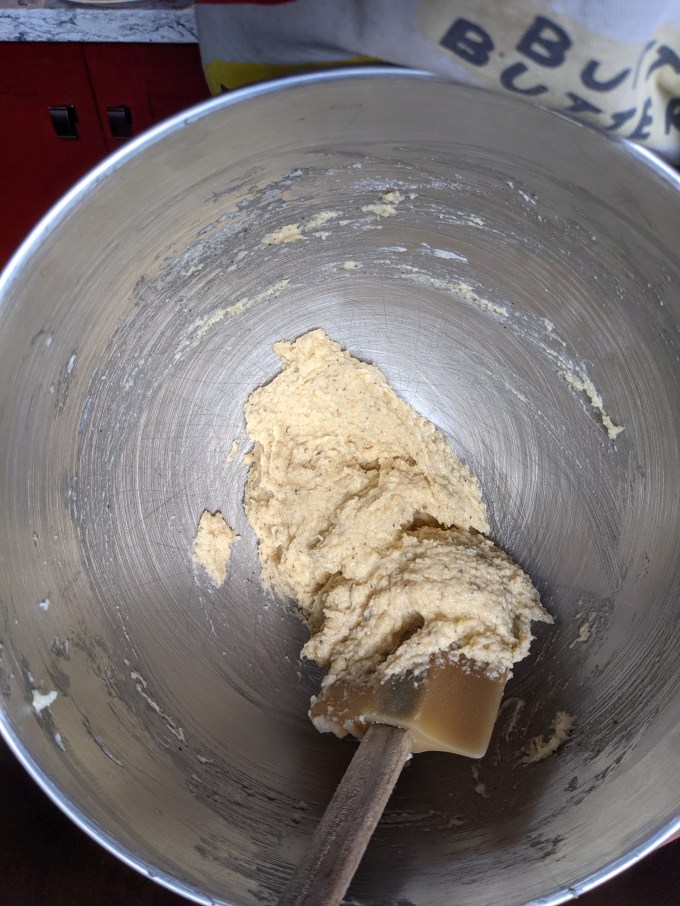
The frangipane is also nice and easy. Butter and sugar are creamed together, then mixed with eggs: the start of thousands and thousands of beautiful bakes. Ground almonds, a touch of flour, and a bit of salt are added and well mixed, and that is all there is to a nice frangipane.

The jam is spread into the partially baked crust, then the frangipane is layered on top. This is probably the most demanding part of the bake. It is important the jam is cooked to the right consistency so it doesn’t reach the edge of the crust and boil up over the frangipane. It also takes a bit of finesse to spread the frangipane on top of the jam without mixing the two together. I used an ice cream scoop to drop large balls of the frangipane around the surface area of the jam so I didn’t have to manipulate it too much. Then it’s into the oven we go.
Step 3: Glaze and Assembly
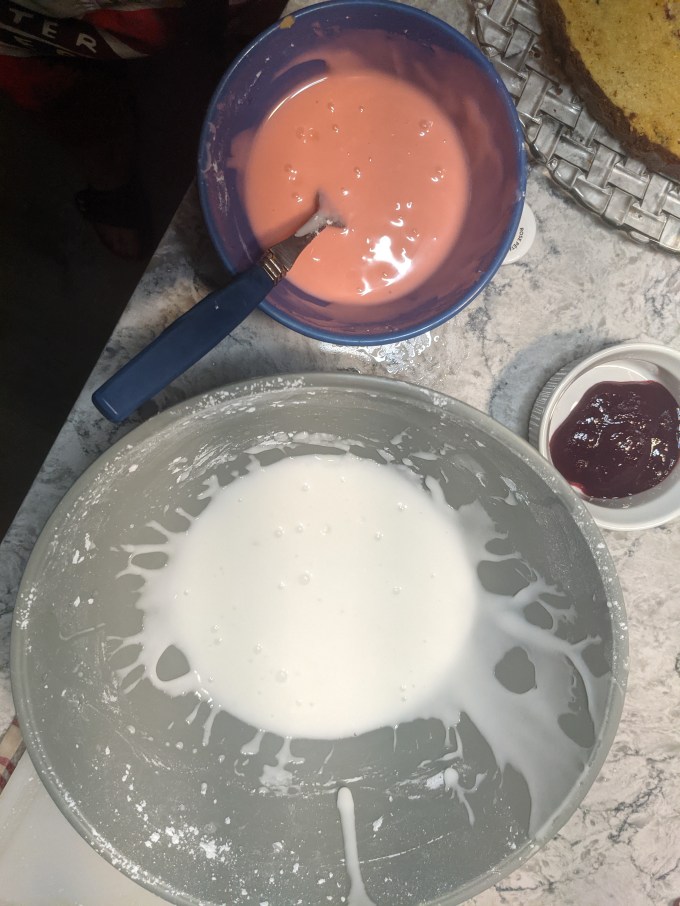
Once the baked tart is cooled, it is ready to glaze. This is a simple icing sugar glaze made of icing sugar and water and a bit of almond extract. A portion of the glaze is reserved and dyed pink with food colouring. The white glaze is spread on top of the tart. The pink glaze is piped on in parallel lines and then something pointy (I used a bamboo skewer) is dragged back and forth through the lines to create a classic feathered effect. Top with a glace cherry and the Bakewell Tart is complete.
Gallery
This tart was tasty, I could have done with less glaze and more frangipane, but it’s all a matter of personal preference, isn’t it? I am glad I have a proper tart pan now. I don’t make a lot of tarts or pies, but I’ve always felt I should have at least one fluted pan in the cupboard so it was worth it to make this just because it motivated me to finally buy the pan. I’m glad I took it for this test run as well because now I am armed with that critical info about tenting the edges. If I had just done this for the blind bake I think this would have been a perfect execution. See you next time!
