
Hello and happy SPOOKY SEASON Friends and Fellow bakers! I always get a little very excited for October: it is my birthday month (#scorpiovibes) and I love halloween and the cooler weather and wearing amorphous clothing to work, so it is with early October enthusiasm that I bring you this week’s bake: RUGELACH.
Rugelach (recipe here) is a Jewish pastry originating from Poland. It is often served around holidays, which is why it was featured on Season 1 Holiday Week of GCBS. Rugelach is the fun, cool cousin of the more famous and challenging croissant. Croissants are made of a laminated yeast dough. Rugelach is more of a quickie version using short dough (short dough meaning it has fat cut in to create flakes; other examples of short dough are basic pie crust and rough puff pastry) enriched with cream cheese and sour cream. It is with great confidence I say: any and all bakes that have cream cheese OR sour cream in them will be superior to counterparts without. Putting both into this dough is some next level evil genius stuff and I am HERE FOR IT.
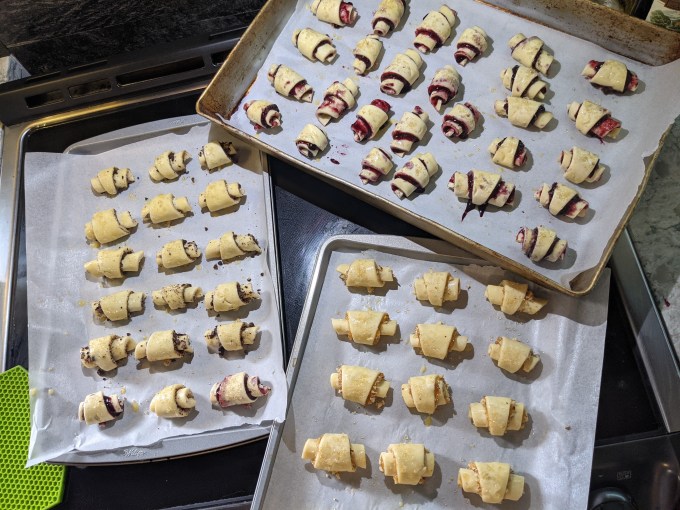
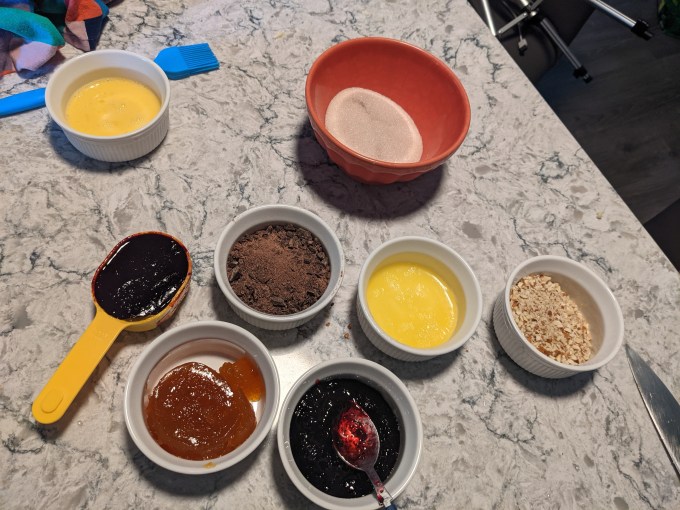
This version from CBC features two flavours: almond apricot and chocolate cinnamon. I knew this bake was going to be ridiculously good so I made a double batch which is a first for the blog. I had a moment where I thought it might be slightly out of scope of this project to double the recipe but then I remembered all of my rules are self-imposed and I am beholden to no one! Also I don’t think I can really bring too much pastry into this world. I decided to try and use up some stuff kicking around in my fridge so in addition to the chocolate and apricot prescribed by the recipe, I made a batch of blueberry and a batch of mixed berry. Now that I’m thinking about it, I should make these again and do a savoury flavour. Marmite and cheddar would be a blast and so would something like gruyere and everything bagel seasoning, perhaps?
The method here is pretty straightforward. The most difficult thing was the bake time. The contestants on the show were not given the bake time, and I have a suspicion they were not provided sufficient time to complete this. None of them presented fully cooked work and Rochelle (judge) said they were “looking for a good 30 minutes in the oven.” However, the recipe provided by CBC after the episode aired called for 35 minutes so I think they actually kind of dropped the ball and made a challenge that was impossible to execute. It was Season 1, so I will give them a pass (hey, we all learn at work, right?), but I’ve got my eye on you and your shenanigans, CBC.
I can see why the contestants had difficulty baking these all the way through. Mine took a really long time (much more than 35 minutes) and I put a couple of the pans back into the oven after letting them cool for a bit, which is a rare move for me. The trade-off to adding all that lovely dairy to the dough is it increases the hydration a great deal. This makes the dough more dense and it gives it higher latent heat capacity (as I always say, all roads lead to latent heat capacity), which means it takes longer to absorb the heat. It also means there is more water that needs to evaporate out.
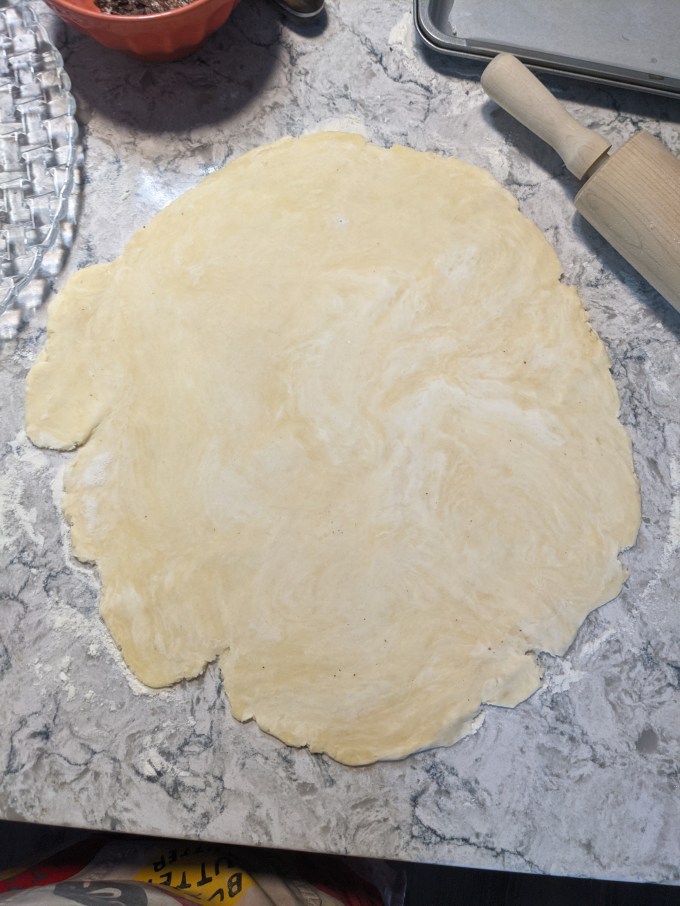
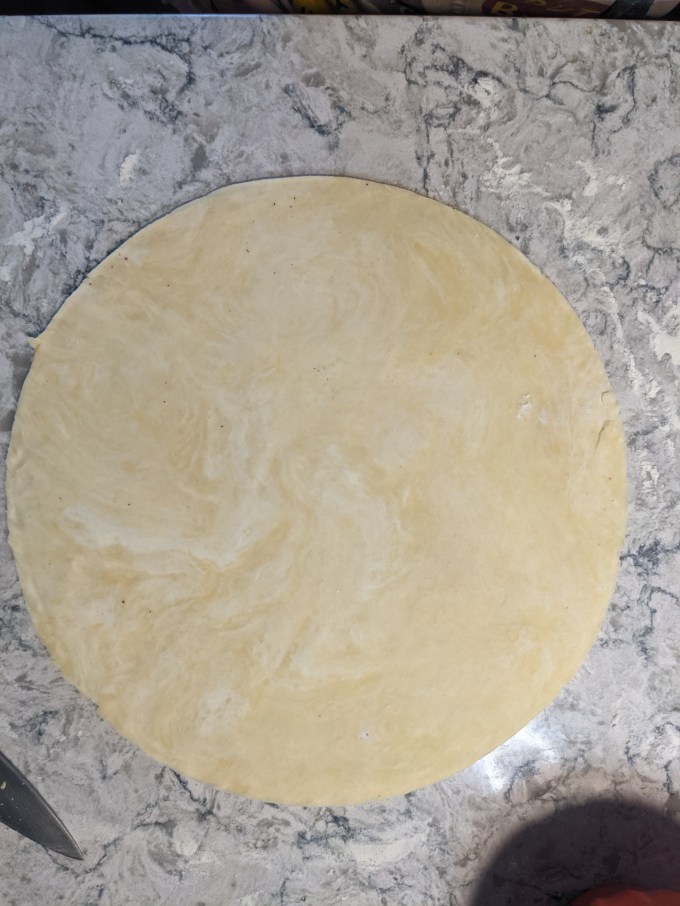
The other challenge I had was the roll out. It wasn’t totally clear to me how thin this dough should be. The recipe said to divide it equally and then roll out to a 12 inch disk. The first one I rolled out to what I instinctively felt was the right thickness. After I trimmed the edges to make a perfect circle, I had quite a large handful of leftover dough. It felt like too much leftover dough. So for the next one, I rolled it until it was just big enough to trim to 12 inches and stopped. I felt like this one was way too thick. Since I was making a double batch, I tried to find the middle ground between these two extremes for the remaining two discs. The result is a bit of a loss on uniformity in my batch and I still have no idea what the actual cook time for these should be. I just kept an eye on them and kept testing them. I was glad I made a double batch so I had lots of extra to spare to keep checking them by cutting them in half instead of just looking at the outside.
In the end, I managed to get them all cooked. The filling on my berry ones bled out a lot and I had to clean them up a bit with a paring knife before serving them. The apricot and chocolate flavours both had coarse, solid elements to the filling (the raw chocolate and the chopped almonds) which acted like an adhesive to keep the filling together as it cooked. I would keep this in mind for any future batches. It’s advisable to put a texture element in there to create some friction as the jam melts in the oven. Lesson learned. Other than the leakage on the berry flavours, my pastry was good. It was nice and flaky and the turbinado sugar on top is a nice finish. All in all, a successful, tasty bake.
Step 1: Dough
As I said, this is a basic short dough enriched with cream cheese and sour cream. The basic steps are not really any different from making pie crust or shortbread cookies. The butter and dry ingredients are blitzed to coarse crumbs. I prefer to use a food processor, but this can be done manually using a pastry blender or two knives. The key is to keep everything as cold as possible.
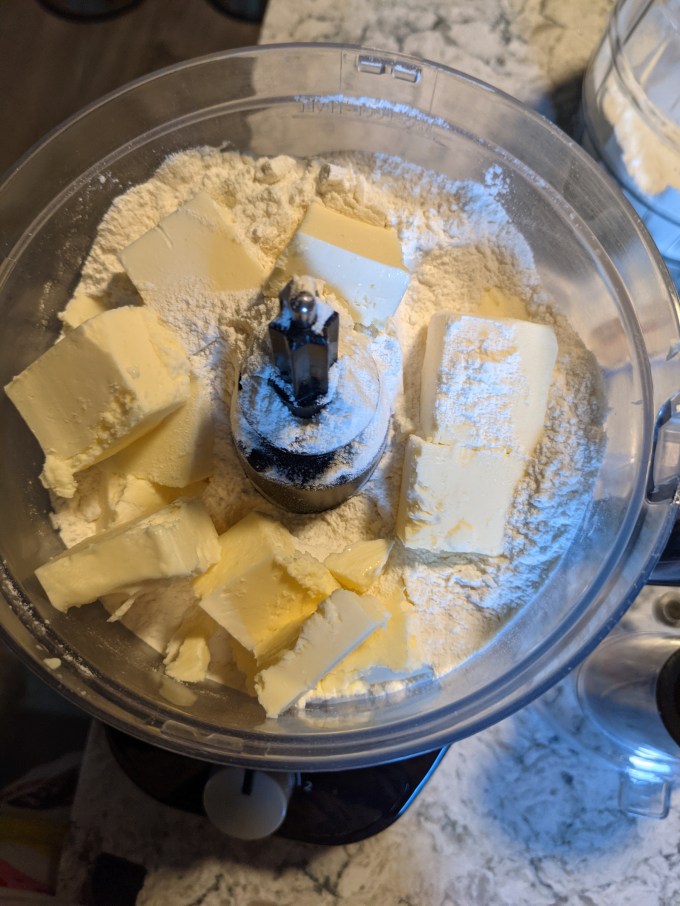
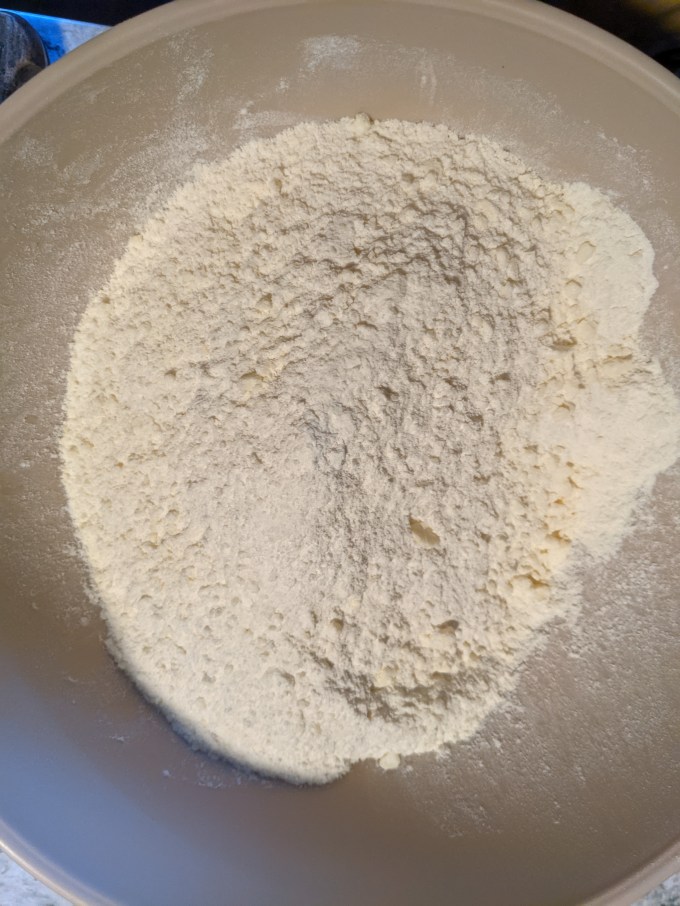
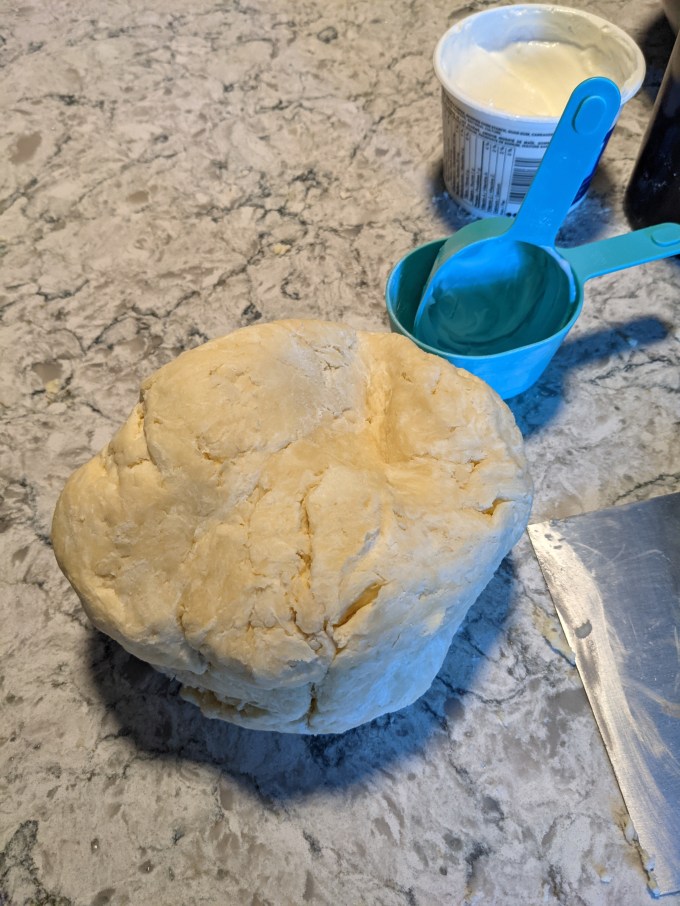
The (cold) dairy is incorporated in. The recipe noted to work quickly (but of course it didn’t explain WHY, god forbid the CBC recipe be complete or helpful in any way), but didn’t really explain how to work the dough. Since I was making a double batch, the volume of mine was pretty large and I understood the basic principle of what I was trying to do here, so I decided to turn the whole mixture out onto the bench and chop it up with my bench scraper. Once I had the dairy mostly incorporated, I switched to a quick knead to bring it together, making sure not to overmix. It is expected to see some streaks of cream cheese in the dough at this stage because it will get worked further at roll out.
Step 2: Filings
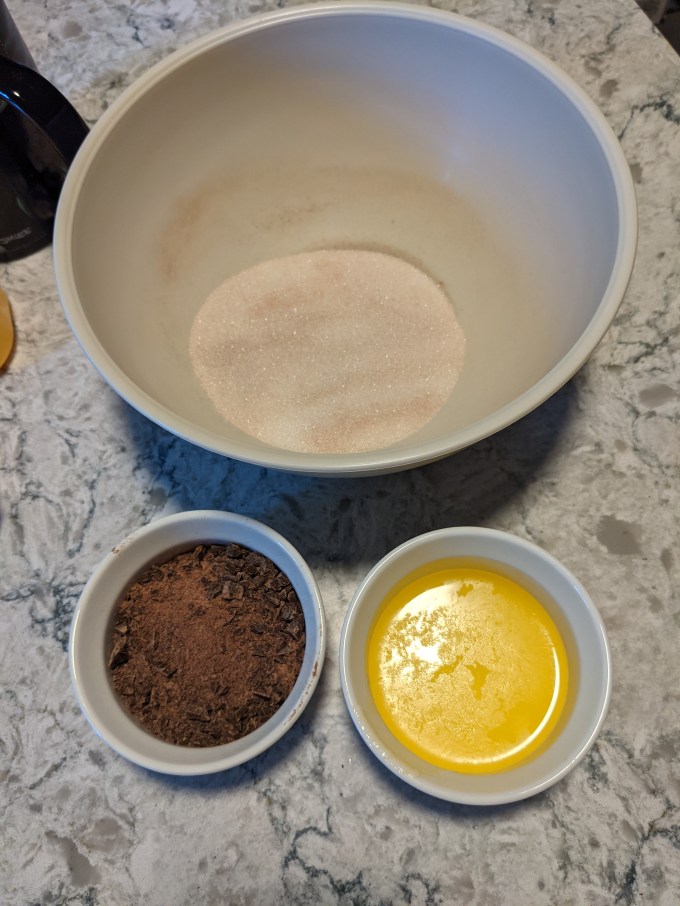
All of the fillings for this bake were nice and simple. The chocolate gets chopped up as-is. Cinnamon and sugar are combined and set aside. Apricot jam is stirred up to loosen it and almonds are finely chopped. Easy peasy. For the blueberry, I just used jarred blueberry jam, same as the apricot. For the mixed berry, I made some jam with frozen berries, sugar, and apple pectin. Easy peasy.
Step 3: Roll out and assembly
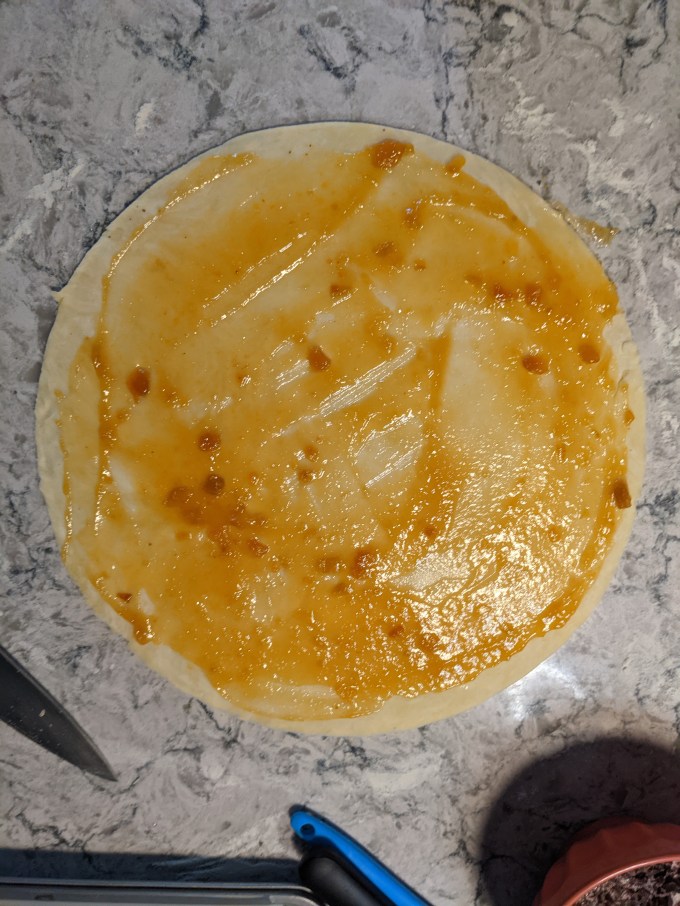
After resting and chilling in the freezer, the dough gets rolled out and trimmed to an exact circle. To fill the chocolate batch, melted butter is brushed onto the dough (which I forgot to do LIKE A CHAMP, so I just poured the melted butter on top instead, which doesn’t really make sense, I admit. This was a big IDGAF moment for me, mostly rooted in my hatred for chocolate), then the cinnamon sugar is sprinkled over top and then the chopped chocolate is sprinkled on top of that. For the apricot, the softened jam is spread on top and sprinkled with the almonds. The blueberry and mixed berry I just spread the jams on and that was it.
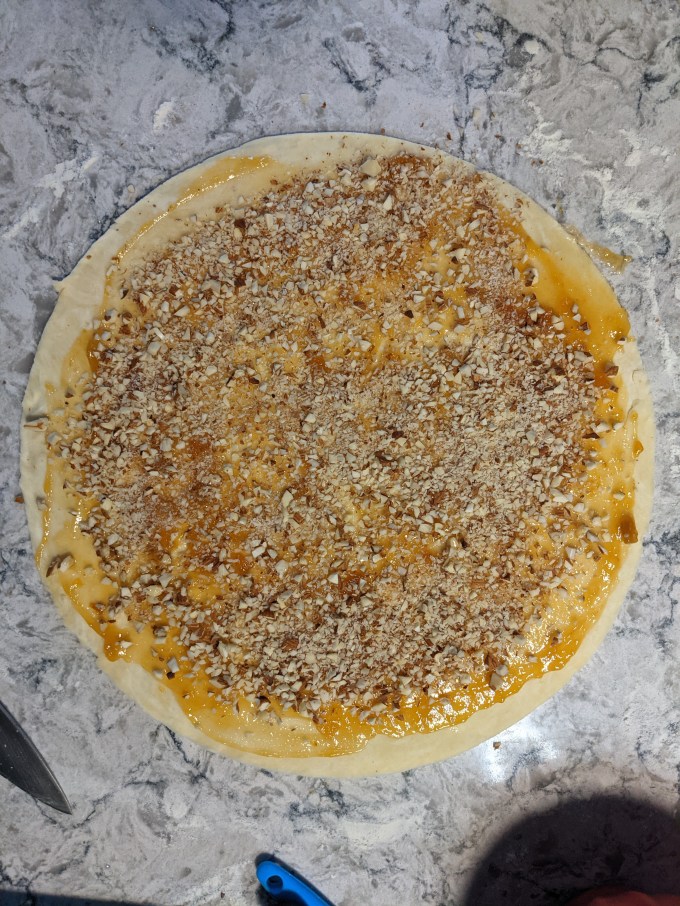
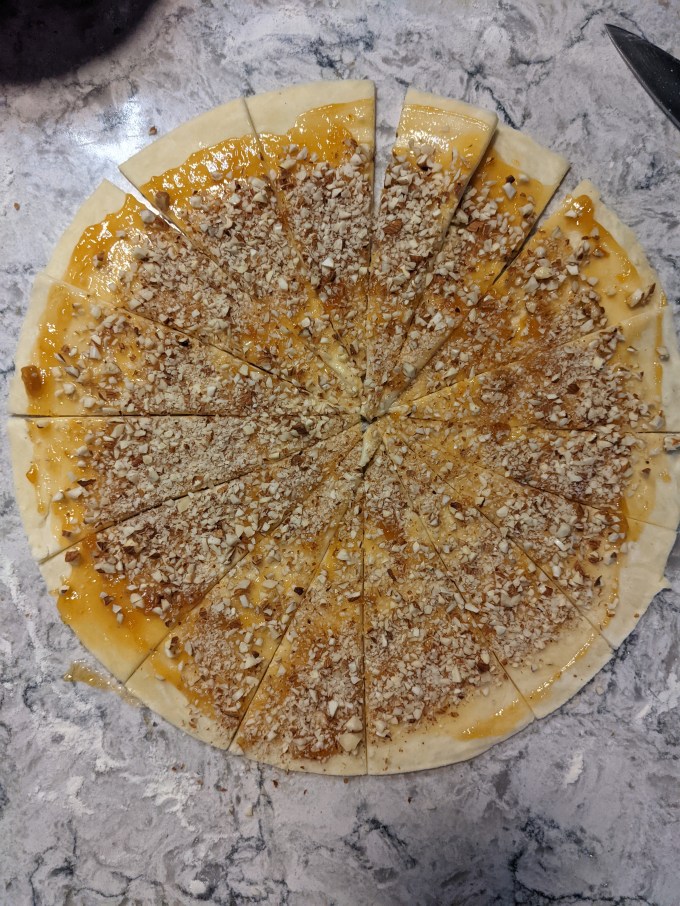
Once the disks are filled, they get cut into 16 wedges, like slicing a pizza. Each wedge is rolled from the wide end inward to create the familiar crescent shape. I feel like I have seen other variations of the folding for Rugelach, but I couldn’t find anything online that backs me up on that, so maybe I am just mis-remembering.The pastries are brushed with egg wash and sprinkled with turbinado sugar. This garnish isn’t just for appearance, it is also to help determine the bake time (although I did not find this super helpful. As I mentioned, these took a lot of trial and error to get the bake time correct, I did not find the colouration of the egg wash was much of an indication of what was going on in the centre of the pastry). Then it’s into the oven we go!
Gallery
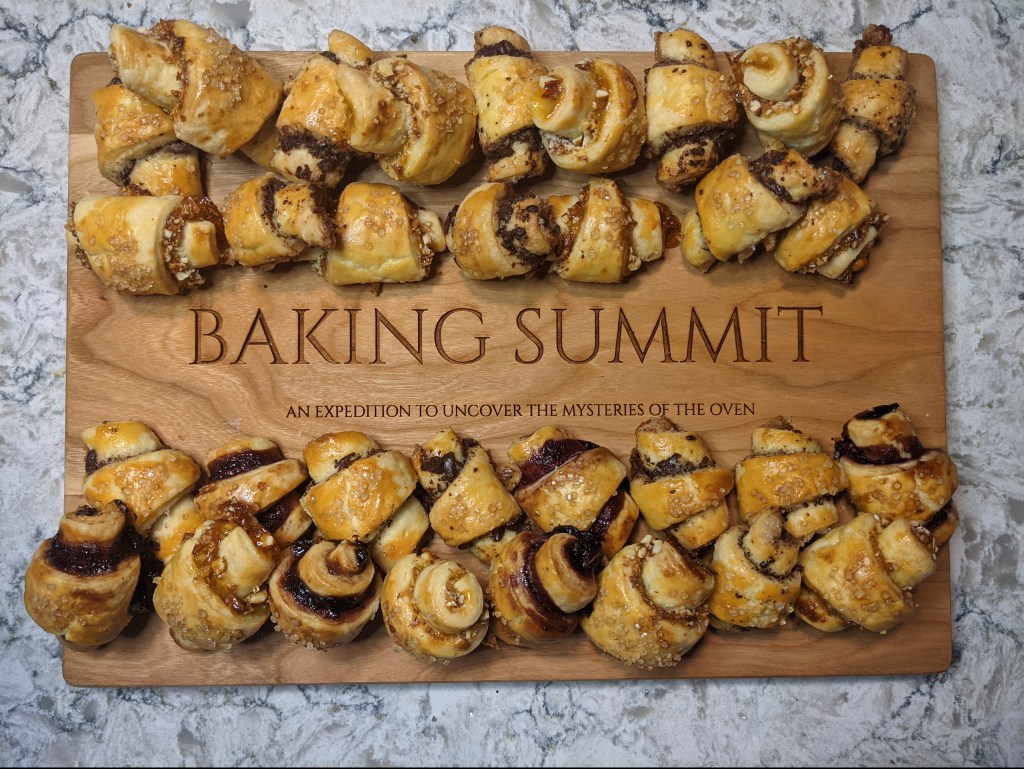
So there we have it, another successful and delicious technical. I had fun making these and I was glad to do it. Rugelach had been on my list of things to try for years but I never think of them when I am trying to come up with something to bring to an event or to work. Now that I have made them once, I am happy to report they are an excellent choice for group serving like potlucks or cookie exchanges, and they are so easy and simple to do. Love to see it. Thanks as always for joining me as we have moved into the second half of this crazy expedition! I have some fun things planned for my favourite month, so I will see you back here before you know it!
Hey, bakers! Check out my BAKER’S PANTRY index if you want to deep dive on specific ingredients when attempting this bake for yourself

I love this site!! I’m gaining weight though reading it. Yummy!!!!
LikeLiked by 1 person
Haha thanks for stopping by!
LikeLike