
Why hello there, Friends and Fellow Bakers! Here we are again and I can’t believe we are at bake #20! The time, she flies! Today we are talking about Orange Chiffon cake (recipe here), which was featured on Season 2 Cake Week of GCBS.
Chiffon cake is a sort of hybrid between an angel food cake and a traditional sponge cake. Angel food cake is made with egg whites only which are whipped to maximum height and then incorporated with a small amount of sugar and flour to make a cake crumb. Chiffon cake is similar, but there is also a regular batter base of yolk and fat added to the whites. This results in a richer final product, but a chiffon will never be as towering tall as angel food. Angel food also has a bit more spring to it whereas chiffon ends with a nice crumb (but it should still spring back. Baking is a nuanced pursuit, if nothing else).
This version is flavoured with orange juice and has candied oranges on top as a decorative accent. The candied citrus added an element of complexity to the bake on the show because the bakers were told to candy citrus with no additional instructions. Once again, in my case I had the instructions so this added nothing in terms of difficulty (or value, because they were not tasty and just ripped the glaze off when I tried to serve it) but they look very nice indeed.
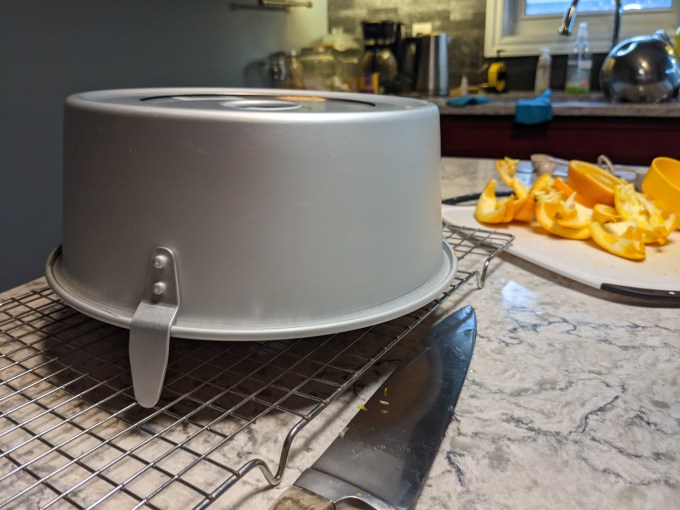
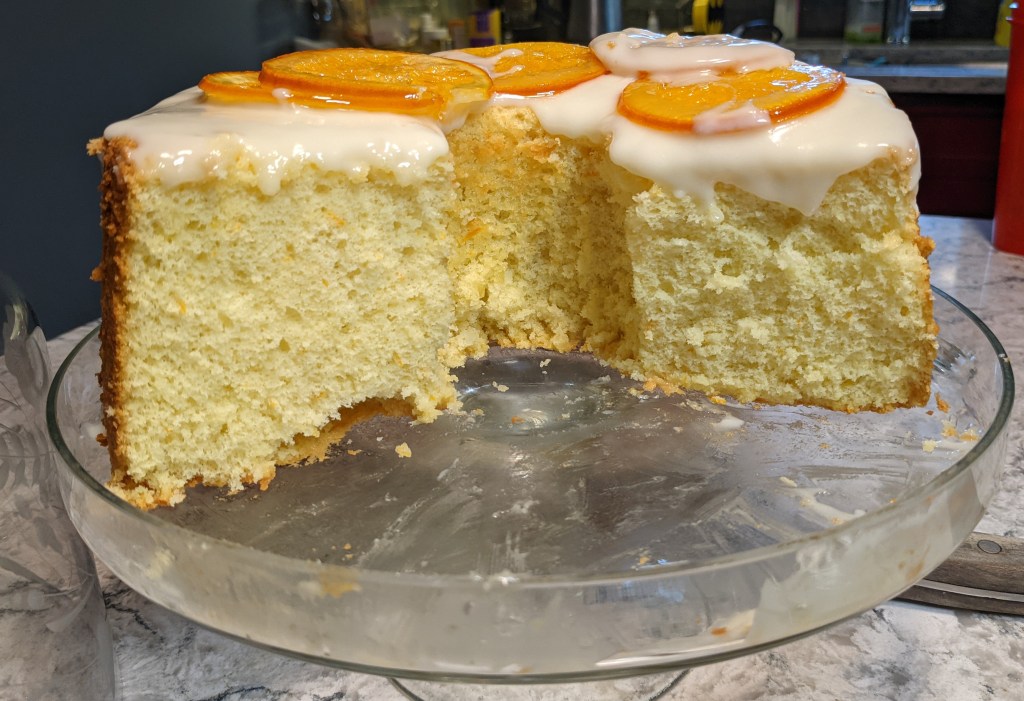
I have never made a chiffon prior to this but I have made angel food at least once so I didn’t feel totally lost. There were also lots of good tips in the episode. Specifically, the fact that you have to cool the cake upside down in the tin was crucial and I doubt I would have figured that out on my own (although this was included in the recipe, so maybe I would have done ok, who’s to say). I re-watched the technical bake part of this episode once before making mine and two times again after because I am not totally sure how mine stacked up. I could have done a little better unmoulding it, but it wasn’t wrecked or anything. I think my crumb was right, it had spring back and crumb. If anything, I think mine could have used a minute or two longer in the oven and I think it would have been perfect. Another lesson learned is I should have dipped my cake tester way deeper into the crumb. I didn’t even own a tube pan prior to this so I didn’t even think of that until I realized it needed a bit more time after the fact. All of that being said, I think this was my favourite cake that I have ever made in terms of eating experience. I don’t go in too much for cake. I will have a bite of my own cakes just to test them and if someone is serving cake at their own home I will eat a piece to be polite, but other than that I really have no interest. I usually refrain from cakes at parties and events, I’m usually the weirdo going back for a third helping of mashed potatoes while everyone else is eating the cake. Not so on this day! This cake was FANTASTIC. I took a piece of it to work for lunch every day after I made it until it was gone. Dave ate about a quarter of it in one sitting. Absolutely excellent piece of cake right here, no two ways about it.
I enjoyed making this cake as much as I enjoyed eating it. I find it so satisfying when a bake is a simple and elegant showcase of science. This cake doesn’t need to be dressed up and taken out. It is here to delight us with physics and chemistry and that makes it the Belle of the Ball. Fill that batter with air, get it in the pan, and let it just warm your home like sunshine when it comes out of the oven. Delightful.
Step 1: Batter Base
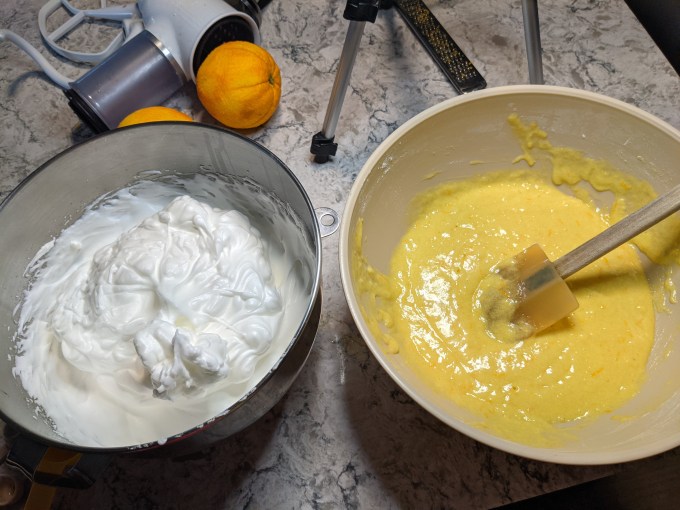
Cake flour and the other dry ingredients are sifted together. Egg yolk, orange juice, orange zest, vegetable oil, and vanilla are whisked until well mixed and then combined with the dry ingredients. It is important not to overmix at this stage or the cake won’t have a proper crumb. Since the flour is mixed with the wet ingredients prior to adding the whites, this is a rare case where cake flour really should be used instead of all purpose. I realize not everyone has cupboards exploding with dozens of esoteric baking ingredients like I do, and in most cases, AP can usually sub for cake flour (I have also heard of people cutting AP with cornstarch to make a closer approximation to cake flour, which is logic I do not get behind). If you are trying to make this cake and you are really in a pinch you could do the substitution but you should be extremely careful about overmixing if you do.


I hate to admit it but I am also going to say sifting the dry ingredients is also a must here. I generally avoid sifting because it’s usually a waste of time, it requires washing another dish, and I can get it done well enough using a fork (-> that’s a Martha Stewart tip I picked up 20 years ago!). Not in this case. This cake relies heavily on the batter retaining every single cubic centimetre of air that you put into it. If the flour is unsifted, even tiny clumps will weigh down the batter and the crumb will become too dense.
Step 2: Sponge
So here comes the star of the show. Egg whites and sugar are whipped to stiff peaks. The whites are folded into the batter base. The entire outcome of this cake depends on proper folding technique and not over mixing. There are different methods of folding, every baker has their own idiosyncrasies. My grandmother was the first one to explain folding to me as “mixing to incorporate air.” Close, Gramma! It’s more that we are trying to retain the air that’s already in there. Nonetheless, I still do it the way she showed me. I gently run the rubber spatula laterally along the bottom of the bowl, lifting some of the batter up and away. Then I FOLD it over the rest of the batter, rotate the bowl, and repeat. If I ever feel like something is taking longer than it should (DON’T OVER MIX!!!!), I throw in a little bit of Juila Child and slice through the middle of the batter and fold half of the batter at a time.
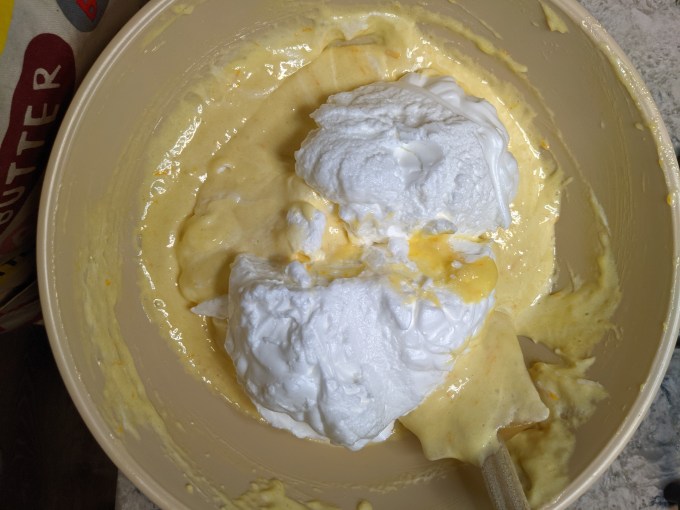
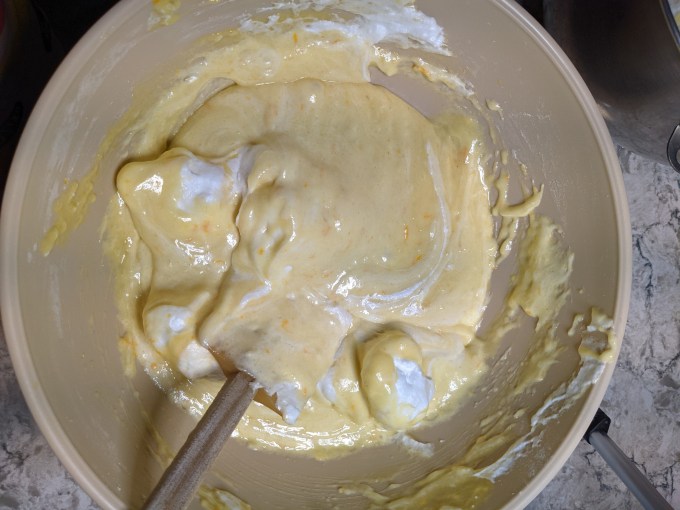
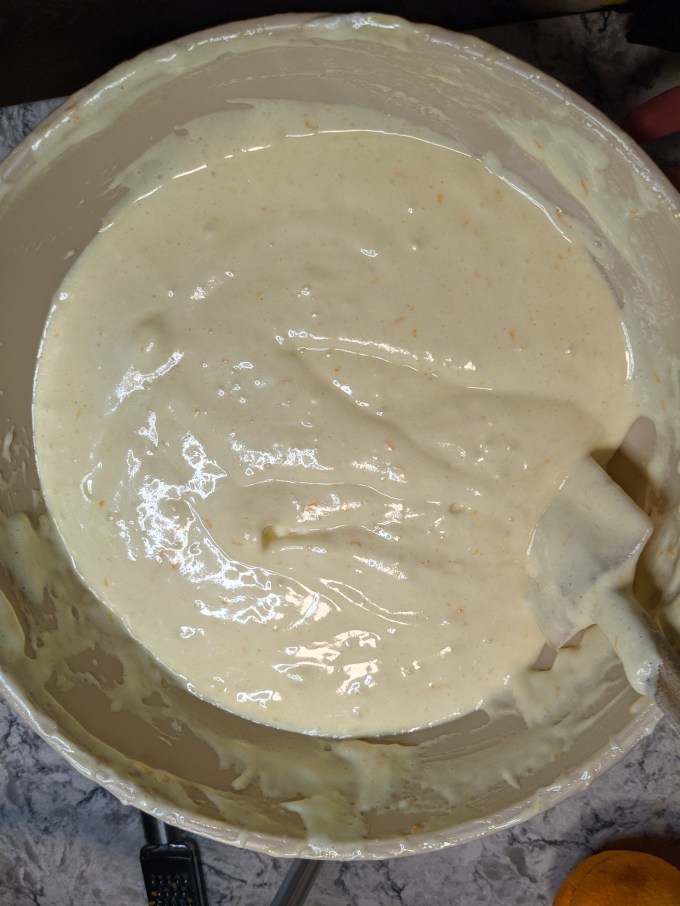
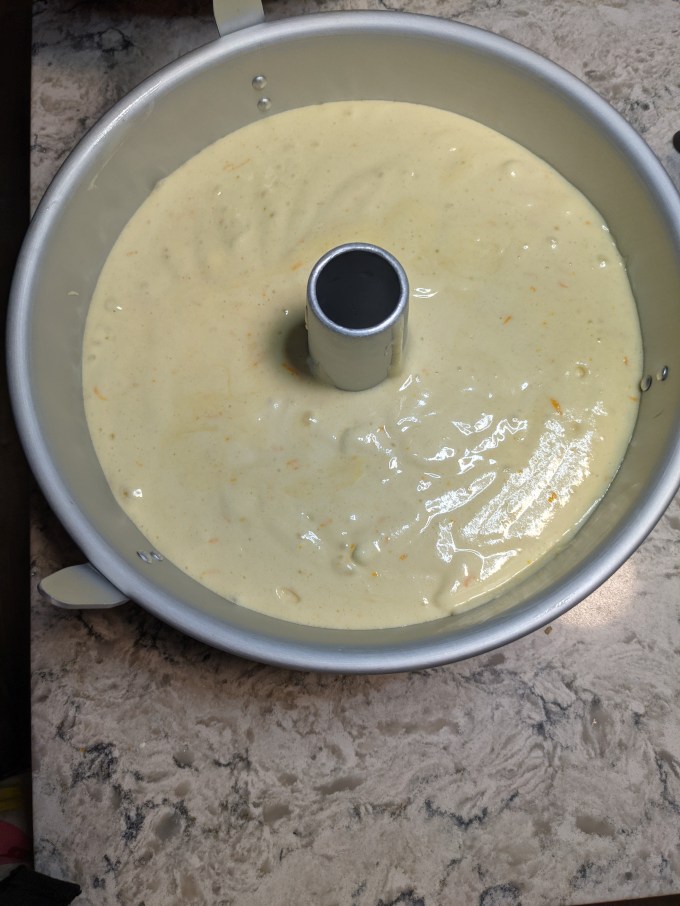
The batter is fully mixed once it is homogenous and there are no more visible streaks of egg white. It is then poured into an ungreased tube pan and it’s into the oven we go!
Step 3: Candied Citrus
I used to be quite fascinated with candied citrus when I was a kid. I think it stems from my love of marmalade, which we never had at our house but my grandmother always did. (Apparently my grandmother is a guest star on today’s post, may she rest in peace). Even though this element didn’t really add anything to the cake, I was still glad to make it. The process of candying fruit works by boiling the fruit in syrup for an extended period of time. Eventually, the sugar in the syrup will replace all of the water in the fruit, including the rind. The end result is a fully edible, candied piece of fruit. Did you ever imagine revisiting your tenth grade pre-chemistry lessons on a baking blog? (Who remembers learning about osmosis and hypertonic solutions? Anyone?) These modern times!
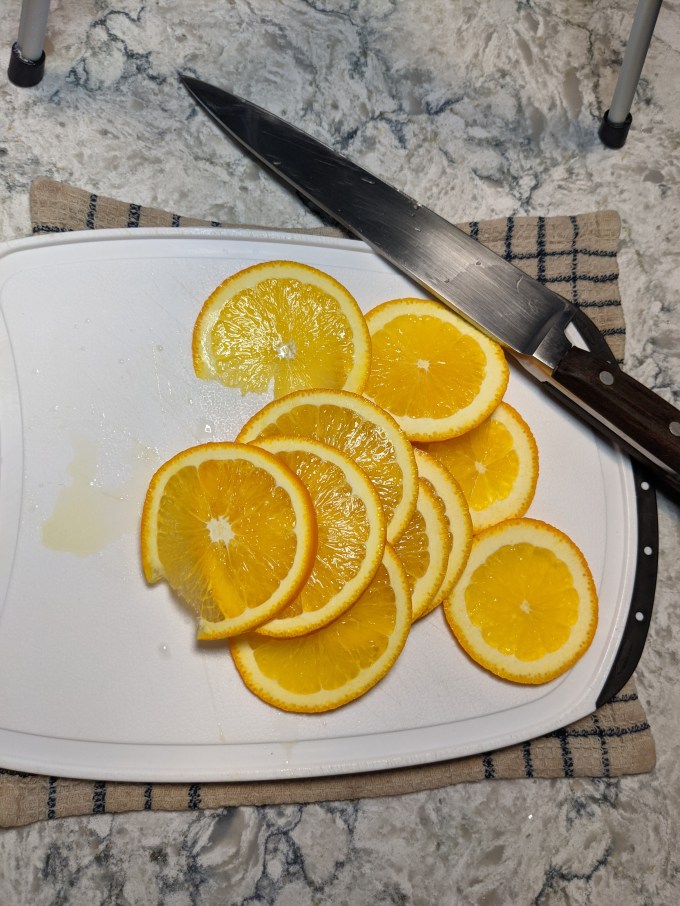
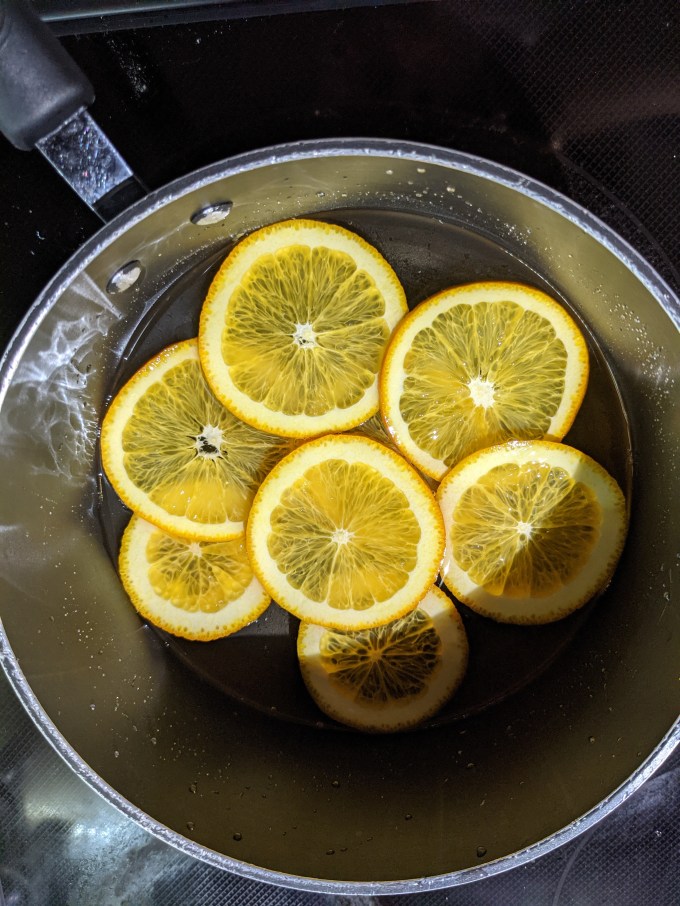
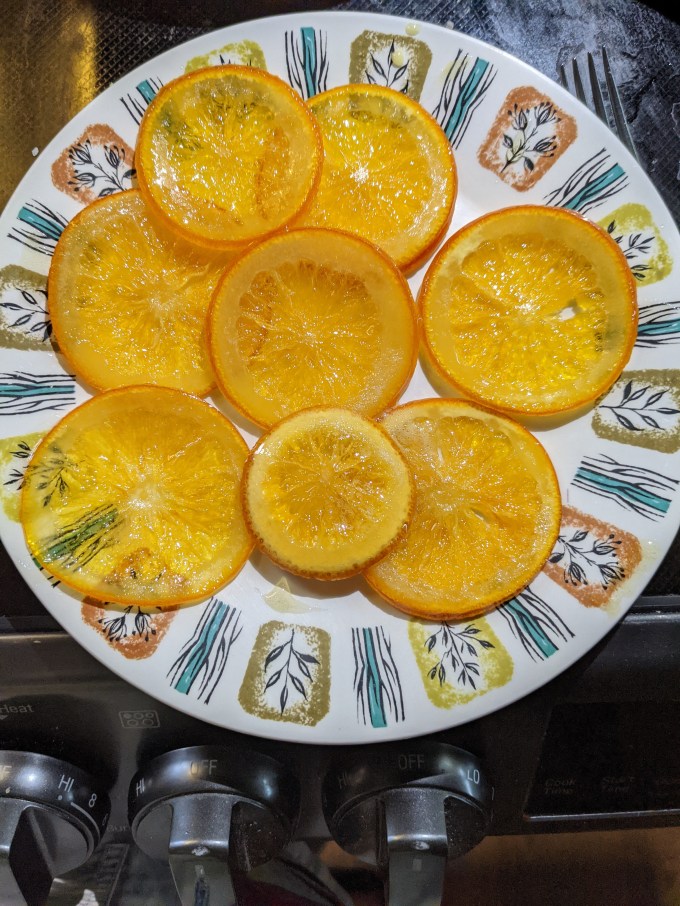
This is the same process that is used to make commercially candied fruit such as glace cherries and that frightening fruit mix that’s only available at Christmas time. I think mine turned out ok. I probably boiled them too long and should have flipped them much sooner than I did, but they were edible. Edible is the goal here, I guess. The leftover syrup turned a beautiful orange and had a nice citrus note so I saved it to use in something else.

Step 4: Glaze
This was a simple glaze of icing sugar, orange juice, evaporated milk, corn syrup and vanilla. The contestants had to guess at the ratios. I had the quantities of course, but I just read them and eyeballed it. I wasn’t about to waste my time measuring 5 different liquids when I know how to adjust a glaze like this on the fly if the consistency is a bit off. The glaze was quite tasty and was a perfect garnish, both in appearance and eating experience, for this adorable cake.

Step 5: Assembly
The cake is cooled upside down so it doesn’t collapse under its own weight as the crumb solidifies. It is then unmolded and served bottom side up. The glaze is drizzled on. I wanted to make my glaze a little more decorative, but the my cake crust peeled a bit when I was ummoulding, so I needed to cover the whole surface to hide the imperfections. More evidence it needed slightly longer in the oven. Such is the life of a baker.
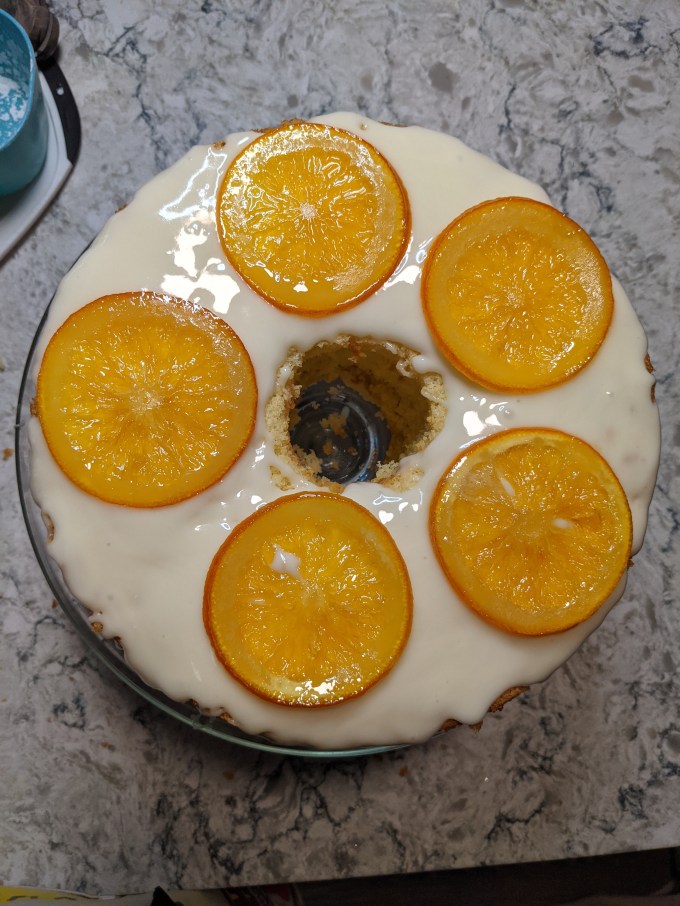
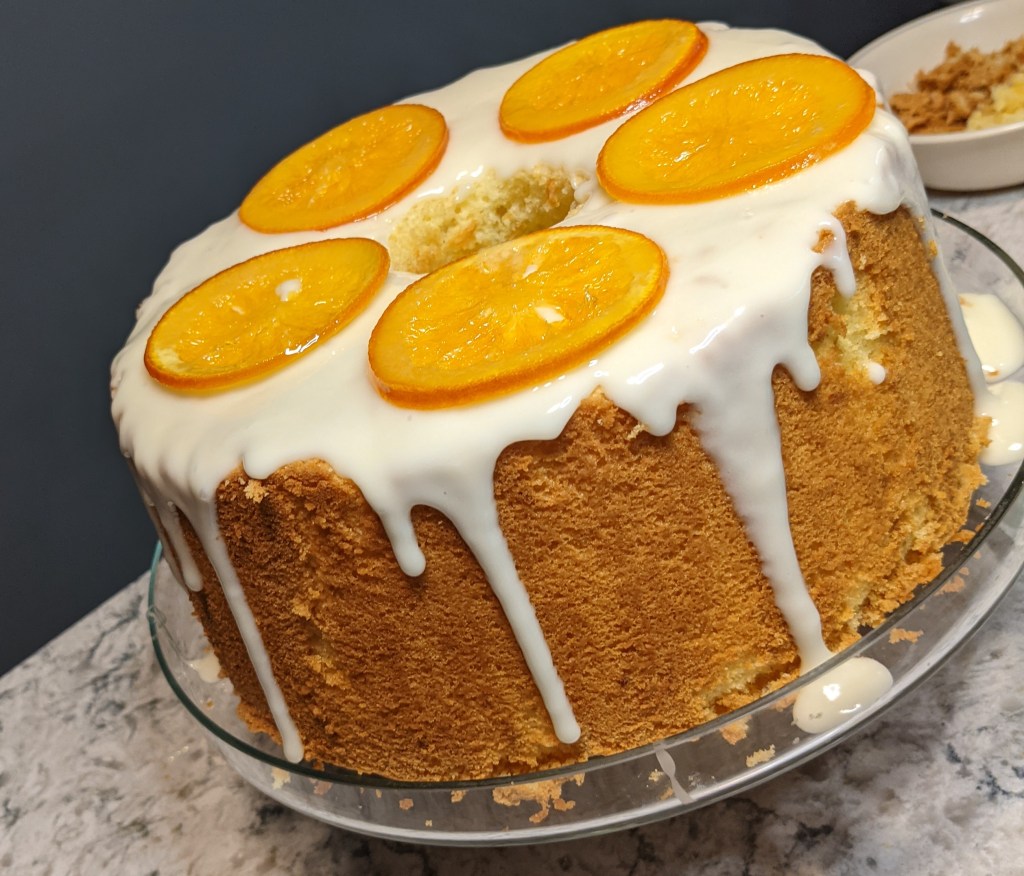
You have to be ready to change gears and fix things for final presentation. The candied citrus is placed on top, and there you have it. A perfectly fluffy, adorably soft orange chiffon cake.
Gallery

This bake hit a lot of high notes for me. It tasted great, I love the minimalist presentation, and the abiding science and artistanship of baking as a craft really shines through. I also accessed a lot of my personal history as a baker while I was making this cake. It was strangely comforting. I had so many fond memories of learning the specific skills for this bake, and how with every new skill I learned, I was looking ahead to the next. My never ending baking expedition started long before this blog, and it brought me here today. It was a different mental landscape for me to make something for this project and have it turn me inwards and backwards instead of towards my usual aspirational point of view. A rewarding and therapeutic bake all around. Now that I am well rested, off we go, forward facing!
Hey, bakers! Check out my BAKER’S PANTRY index if you want to deep dive on specific ingredients when attempting this bake for yourself

Let me eat cake.
LikeLiked by 1 person